
-=HOW TO ADD 2009+ STYLE SWITCHES TO A 2003 MERCURY MARAUDER=-
Tested and complete. 100% working.
Contact me at: tfb[at symbol here]sof.ws - Back to main page: http://www.sof.ws/fatsco
(Flatteringly, some people have asked me for my paypal. It is my e-mail address. Thank you for any donation but don't feel obligated to donate.)
Background:
In 2008 there was a federal mandate that all 2009+ window switches had to be the 'push for down, pull up for up' kind. This is a safety feature so you don't stick your head out the window, put your elbow on the switches and kill yourself.
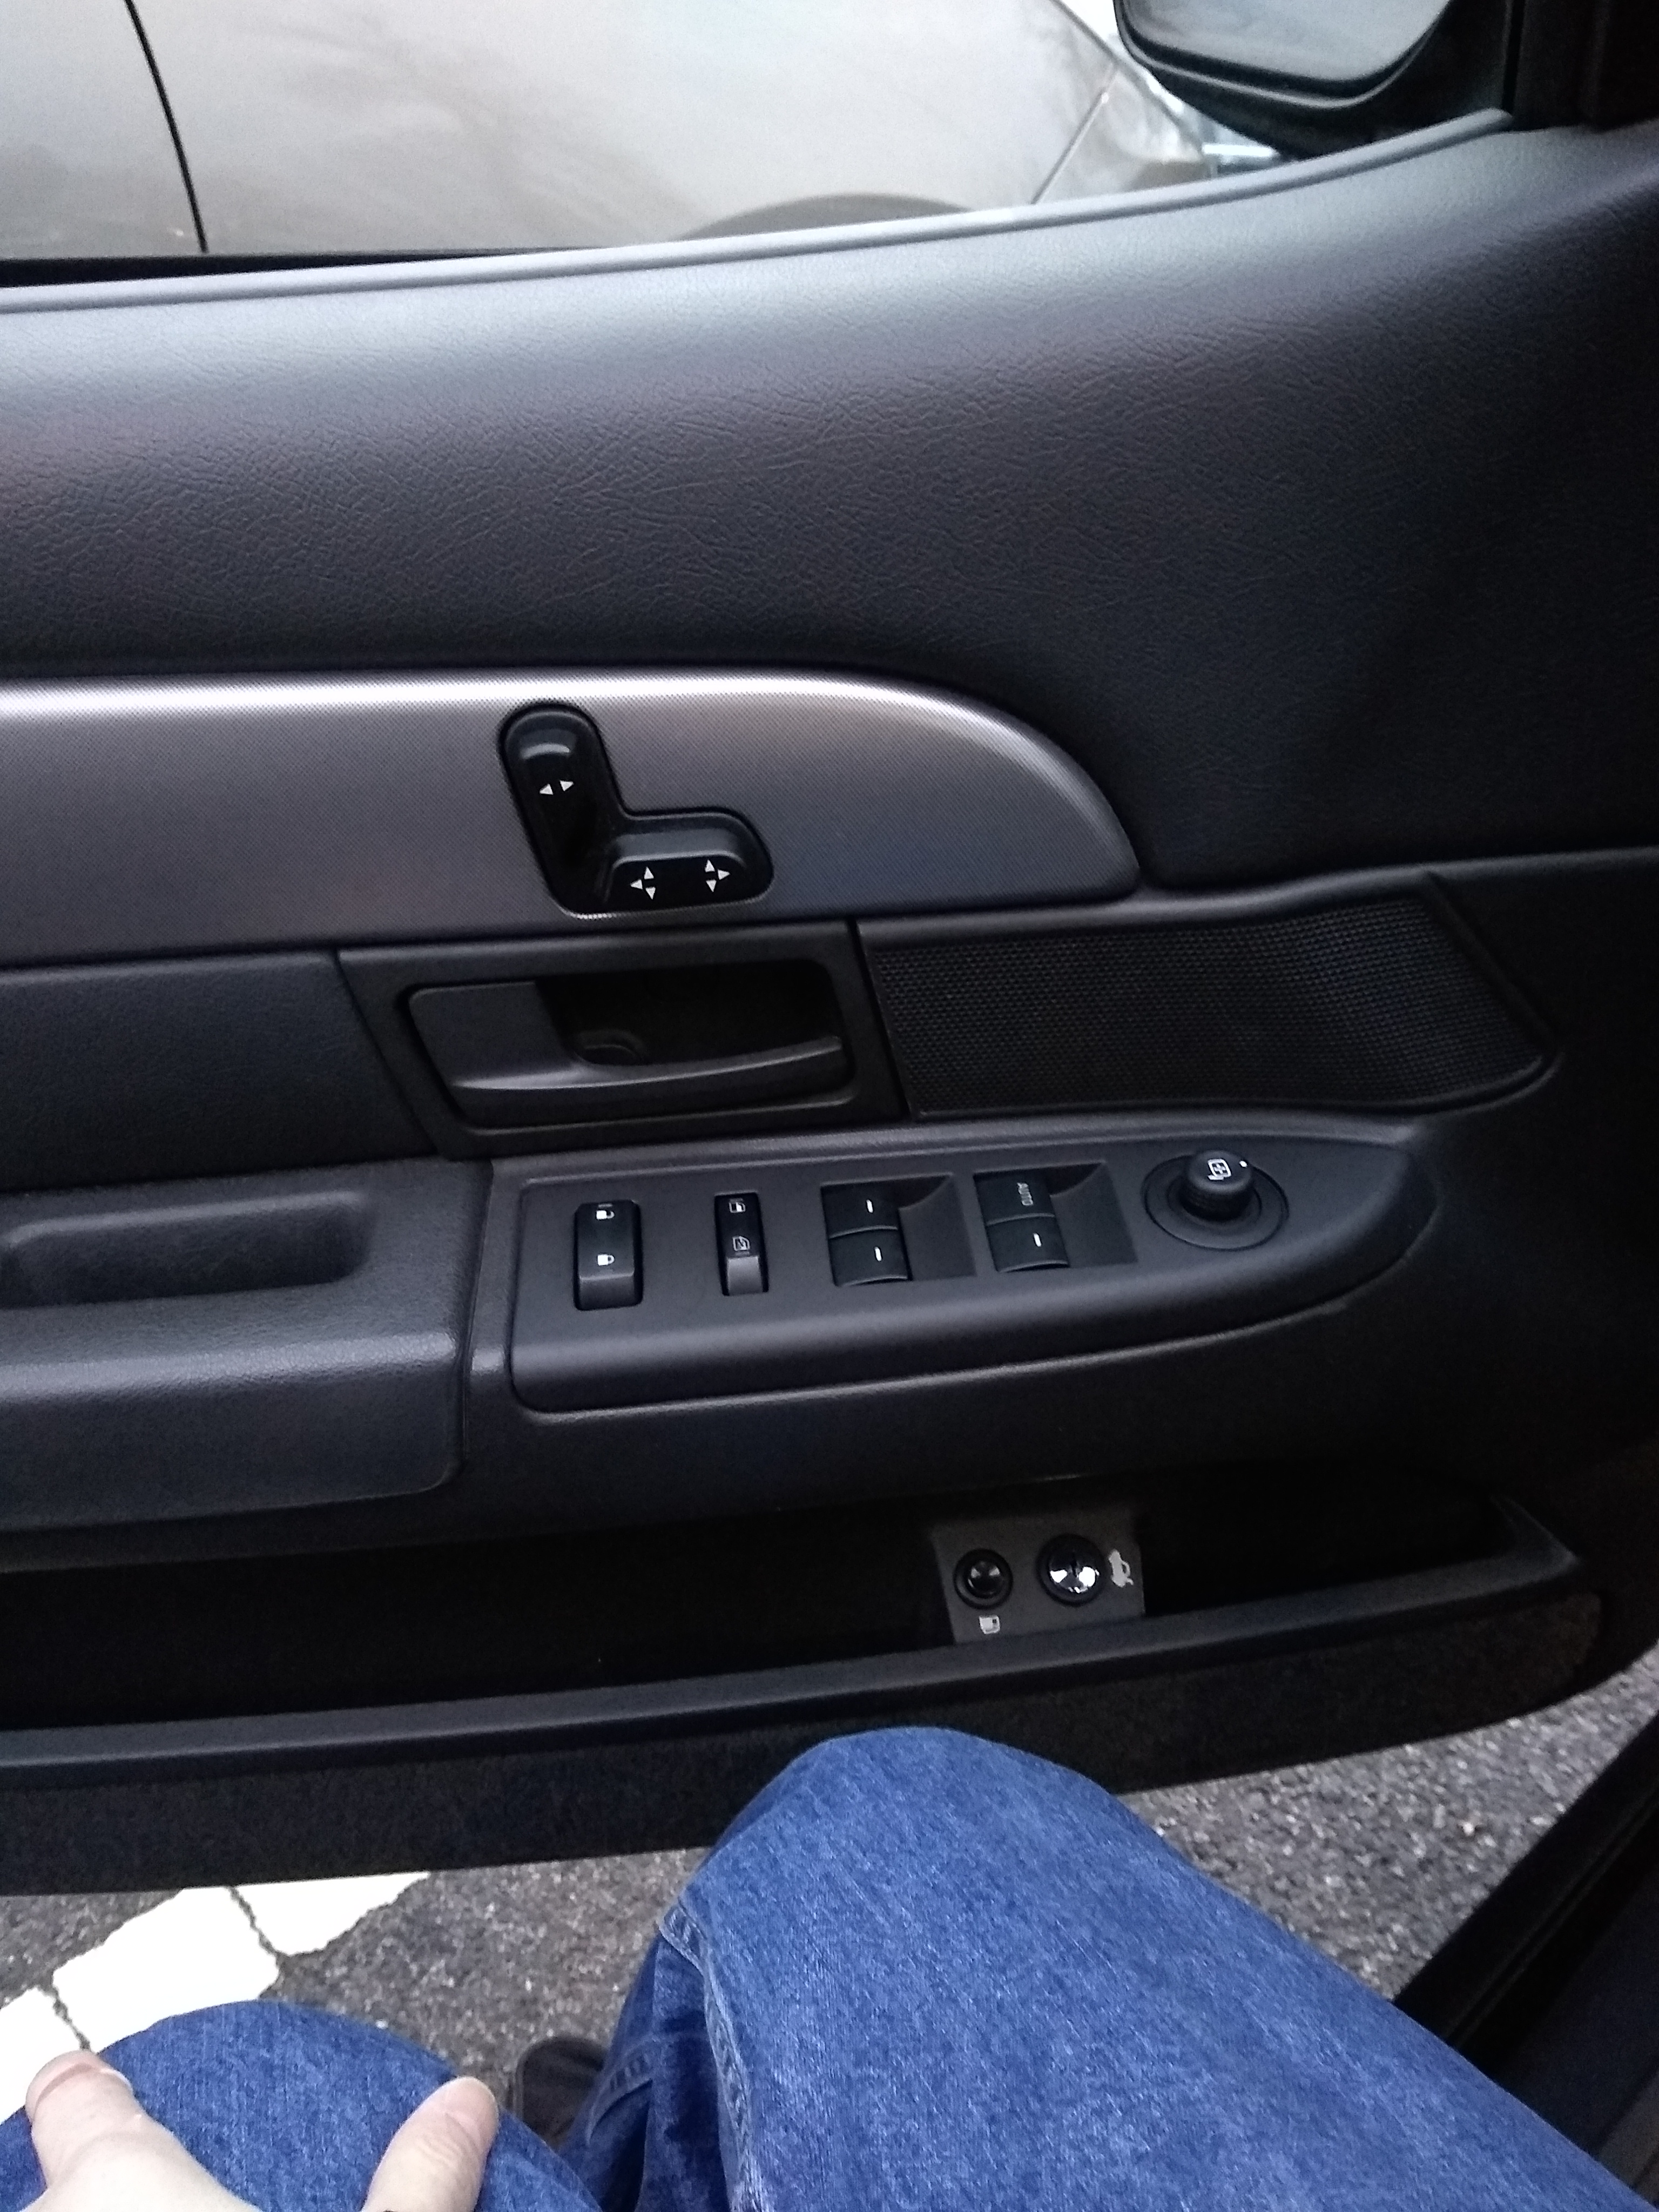
The new style switches lay flush and are square, making them a little more classy and fitting. This also replaces the lock switches and mirror control knob. This retrofit is completely cosmetic.
Instructions used: https://www.crownvic.net without Drac and everyone else, this would not be possible. Thank you!
Tools needed:
Trim puller - Used to pull up the window switch panels. While a flathead screw driver can be used, it may damage or scratch the trim.
Terminal release tools - Used to de-pin connectors. Anything small, flat, and strong can be used.
Needle nose pliers - Used to crimp on the terminals, don't need if you just cut the connectors off.
Wire strippers
Stuff needed just for altering the switch (Not needed if use you use the relay connection method mentioned in the crownvic thread.)
Drill with bits up to about 1/8th
Hot glue gun
Soldering iron
Multimeter with continuity checking.
Parts needed (prices from tasca):
| name | part number | # | each | total |
| Switch Housing - driver | 9W7Z-14528-AF | 1 | $49.99 | |
| Driver's Window Switch | 8E5Z-14529-AA | 1 | $46.26 | |
| Mirror Switch | 8F9Z-17B676-A | 1 | $18.94 | |
| Switch Housing - passenger | 9W7Z-14527-AF | 1 | $44.47 | |
| Window Switch | 6L2Z-14529-AAA | 3 | $5.07 | $15.21 |
| Switch Housing - left rear | 9W7Z-14527-AC | 1 | $45.66 | |
| Switch Housing - right rear | 9W7Z-14528-AC | 1 | $54.66 | |
| Lock Switch | 8C3Z-14028-AA | 2 | $5.14 | $10.28 |
Needed if not cutting off the connectors: Dorman 85347 ford style terminals. Comes in packs of 5, need 18 total (4 packs). Like $2 a pack online. Ford does sell wired terminals as well, part number eu2z-14421-ea but they are $5 EACH.
Connectors needed:
| Motorcraft part number | Ford part number | Purpose | Quantity |
| WPT-1019 | 3u2z-14s411-xvb | window switches | 3 |
| WPT-982 | 6u2z-14s411-jb | lock switch | 2 |
| WPT-485 | 3u2z-14s411-raa | Main window switch | 1 |
| WPT-998 | 3u2z-14s411-dlb | Mirror switch | 1 |
There are 2 kinds of connector kits from motorcraft. The above is the full pigtail. Each connector has every terminal crimped onto a wire and loaded into connector and comes with a wire crimp and heat shrink tubing. About $24 each.
There is also the same motorcraft connectors offered with just the loose terminals for a few buck cheaper than the full pigtails as well. About $17
However, if the manufacturer for the connector can be determined (TE, molex, delphi, 3m, etc) , they can be bought directly from them or from a parts place like mouser or digikey at about only $2 each.
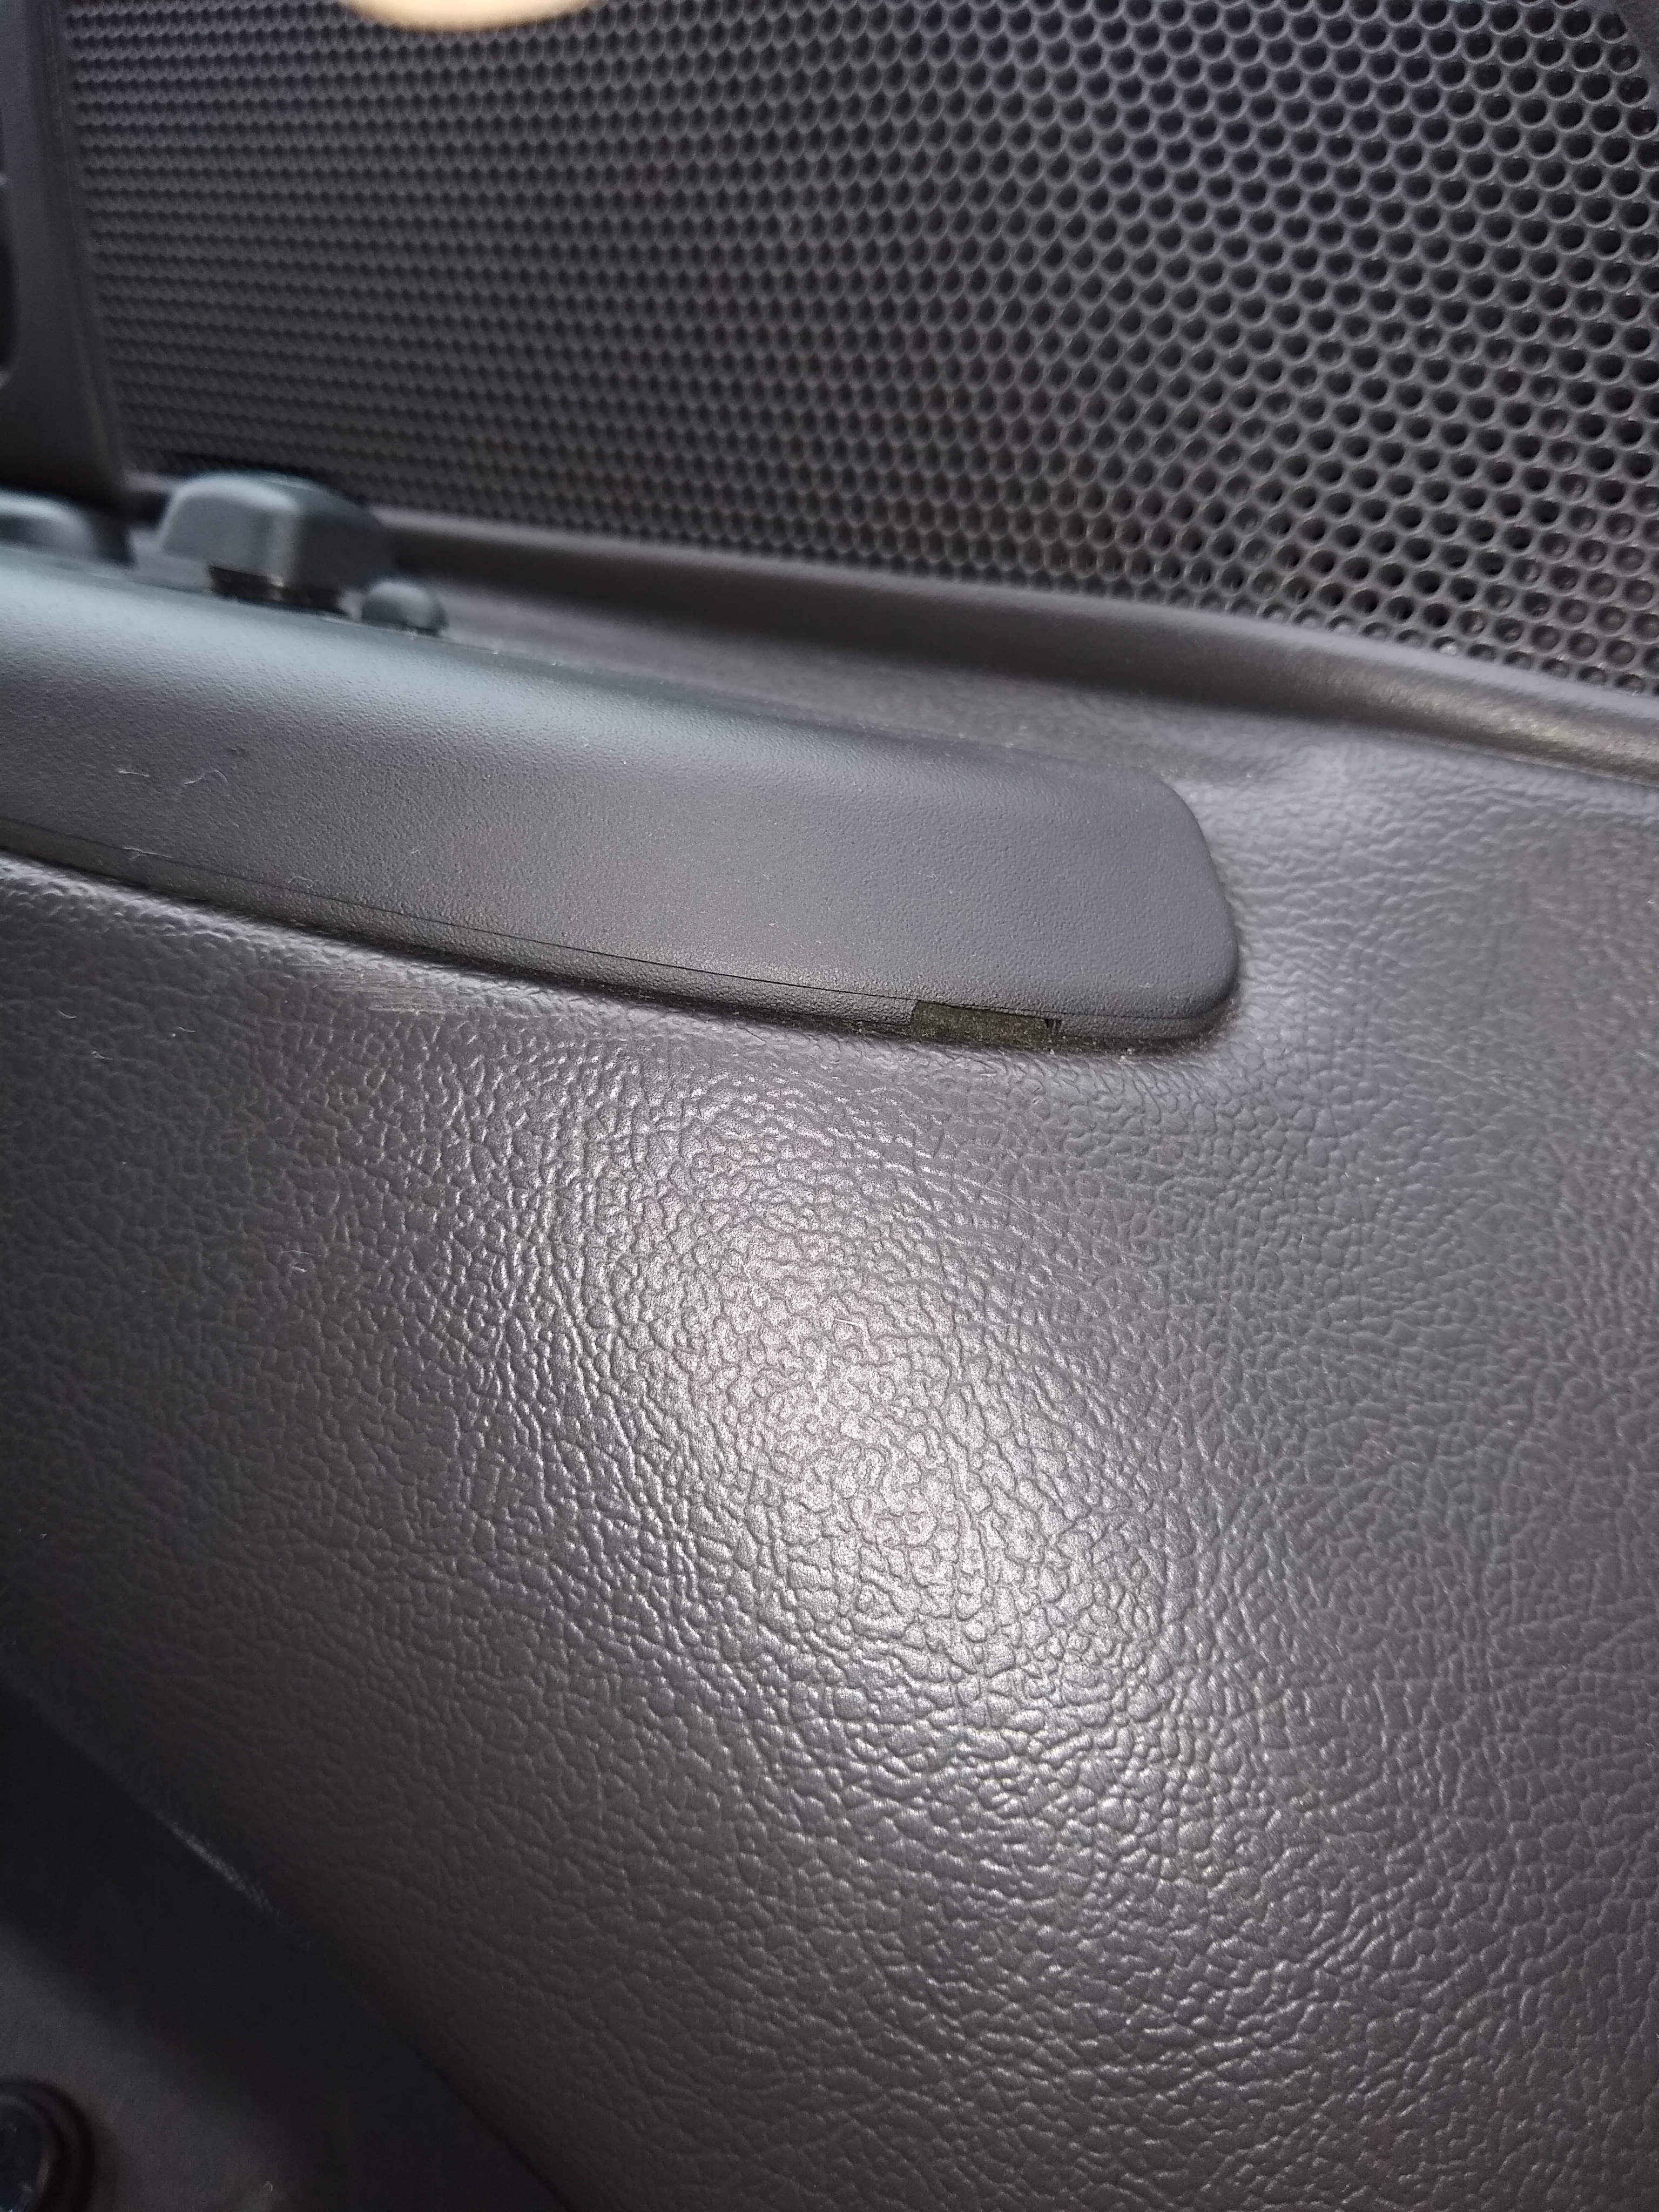
Color:
The color description is 'Black' for all of these while the Marauder's interior is described as 'dark charcoal gray' However, the 2 colors appear to be identical as seen below:
How to pull up the window switch panels
Rear switch panels: Both the front and rear tabs are straight tabs. Use a trim puller in the switch panel gap and pry them up.
Front switch panels: The front tab is straight down, however the rear tab turn under the arm rest. Pulling straight up will break them. Lift the front up from the gap while keeping a hand on the rear of the panel to keep it down. Once the front tab is out, slide the panel forward.
The front tabs can be pushed back with a long enough tool in the gap, allowing for the panels to be pulled up easier. (pretty sure this is the real purpose of the gap)
How to de-pin a connector
Push down on the bottom middle orange tab and pull forward to slide the orange assembly forward, it does not fully come out.
Use a pin or removal tool to pop the terminals up off the little nubs they are resting on. Push in under the terminal from the front until it comes up off the tab, then pull the wire out of the back. If you are having trouble releasing a pin, sometimes going in from the back and fiddling around helps.
To re-pin, push the terminals from the back into the whatever the correct connector is in the correct order. The terminal numbers are written on the back of the connector.
Push the orange clip back in.
How to change out the window switches on the rear passenger, rear driver, and front passenger:
De-pin the stock blue connector, insert the terminals into a wpt-1019 in the following order:
Driver's side rear window connector:
| Pin | stock connector wire color | WPT-1019 wire color |
| 1 | N/C | YEL/LT BLU |
| 2 | YEL/RED (motor connection) | RED/YEL |
| 3 | YEL/LT BLU | RED/LT BLU |
| 4 | RED/LT BLU | N/C |
| 5 | GRY/ORG | YEL/RED |
| 6 | RED/YEL (motor connection) | GRY/ORG |
| 7 | N/C | - |
| 8 | N/C | - |
Passenger's side rear window connector:
| Pin | stock connector wire color | WPT-1019 wire color |
| 1 | N/C | RED/BLK |
| 2 | YEL/RED (motor connection) | RED/YEL |
| 3 | RED/BLK | RED/LT BLU |
| 4 | RED/LT BLU | N/C |
| 5 | YEL/BLK | YEL/RED |
| 6 | RED/YEL (motor connection) | YEL/BLK |
| 7 | N/C | - |
| 8 | N/C | - |
Passenger's side front window connector:
| Pin | stock connector wire color | WPT-1019 wire color |
| 1 | N/C | TAN/LT BLU |
| 2 | RED/YEL (motor connection) | YEL/RED |
| 3 | TAN/LT BLU | RED/LT BLU |
| 4 | RED/LT BLU | N/C |
| 5 | WHT/YEL | RED/YEL |
| 6 | YEL/RED (motor connection) | WHT/YEL |
| 7 | N/C | - |
| 8 | N/C | - |
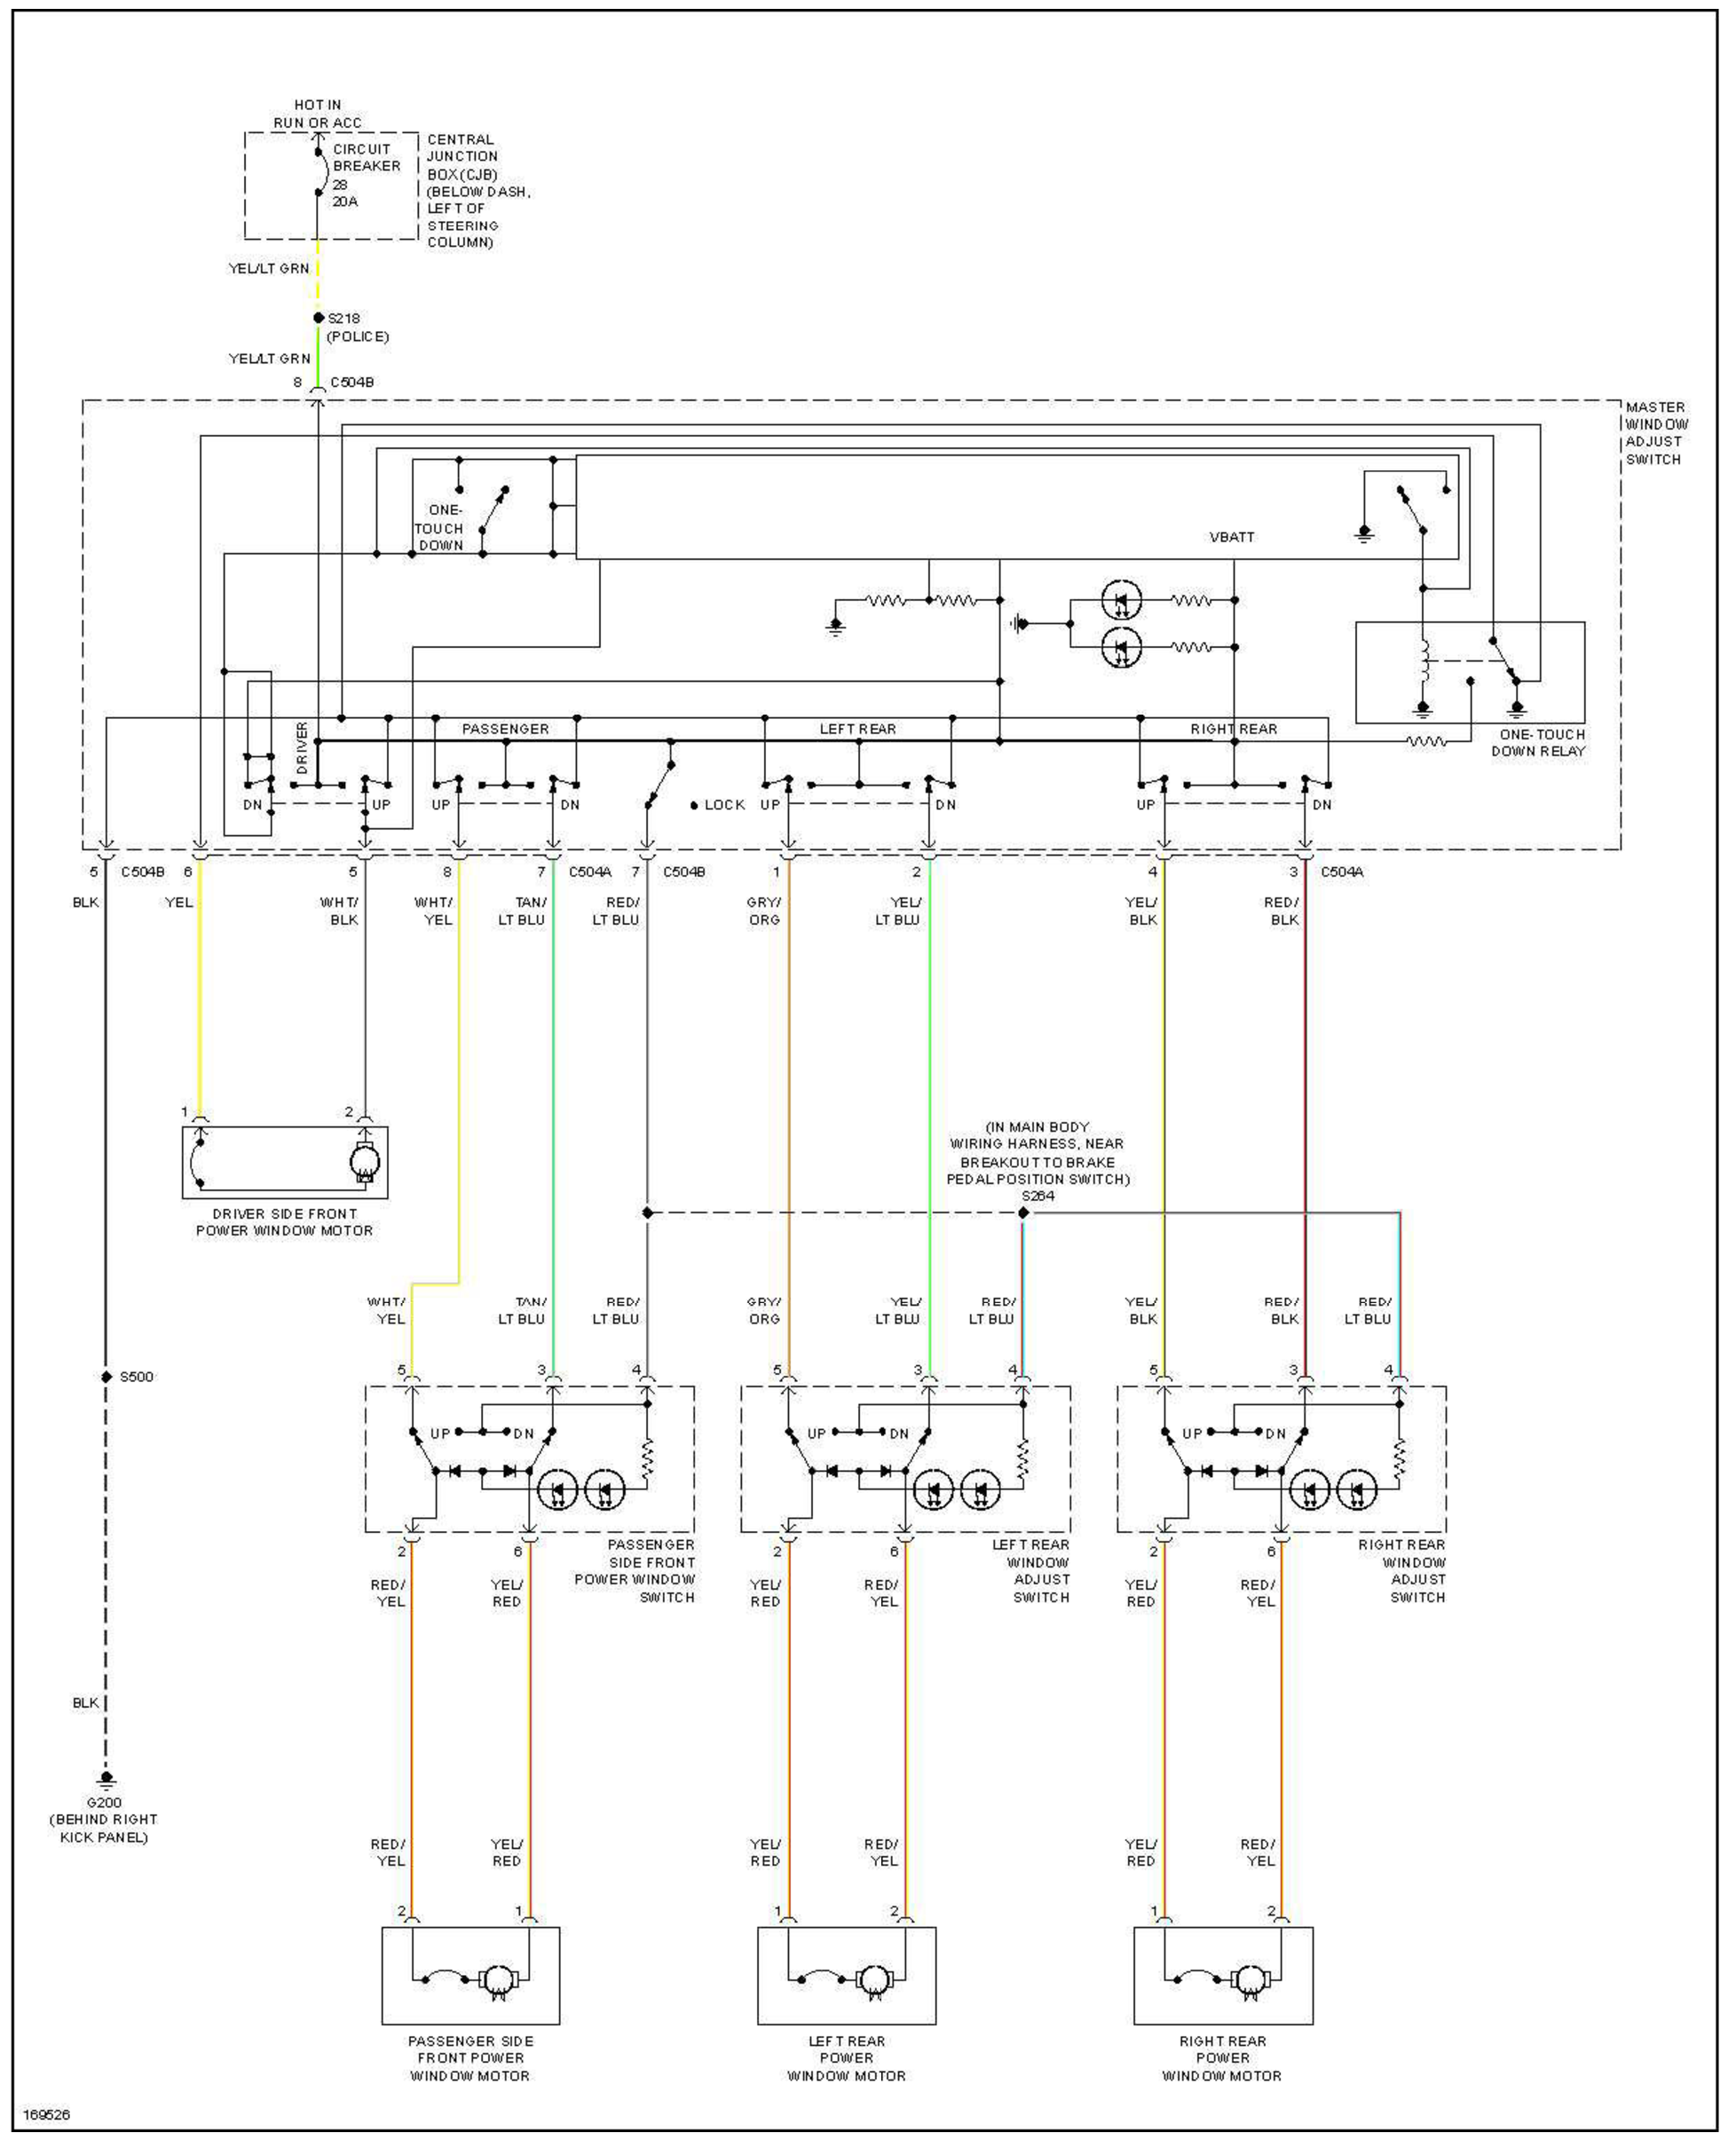
Marauder:
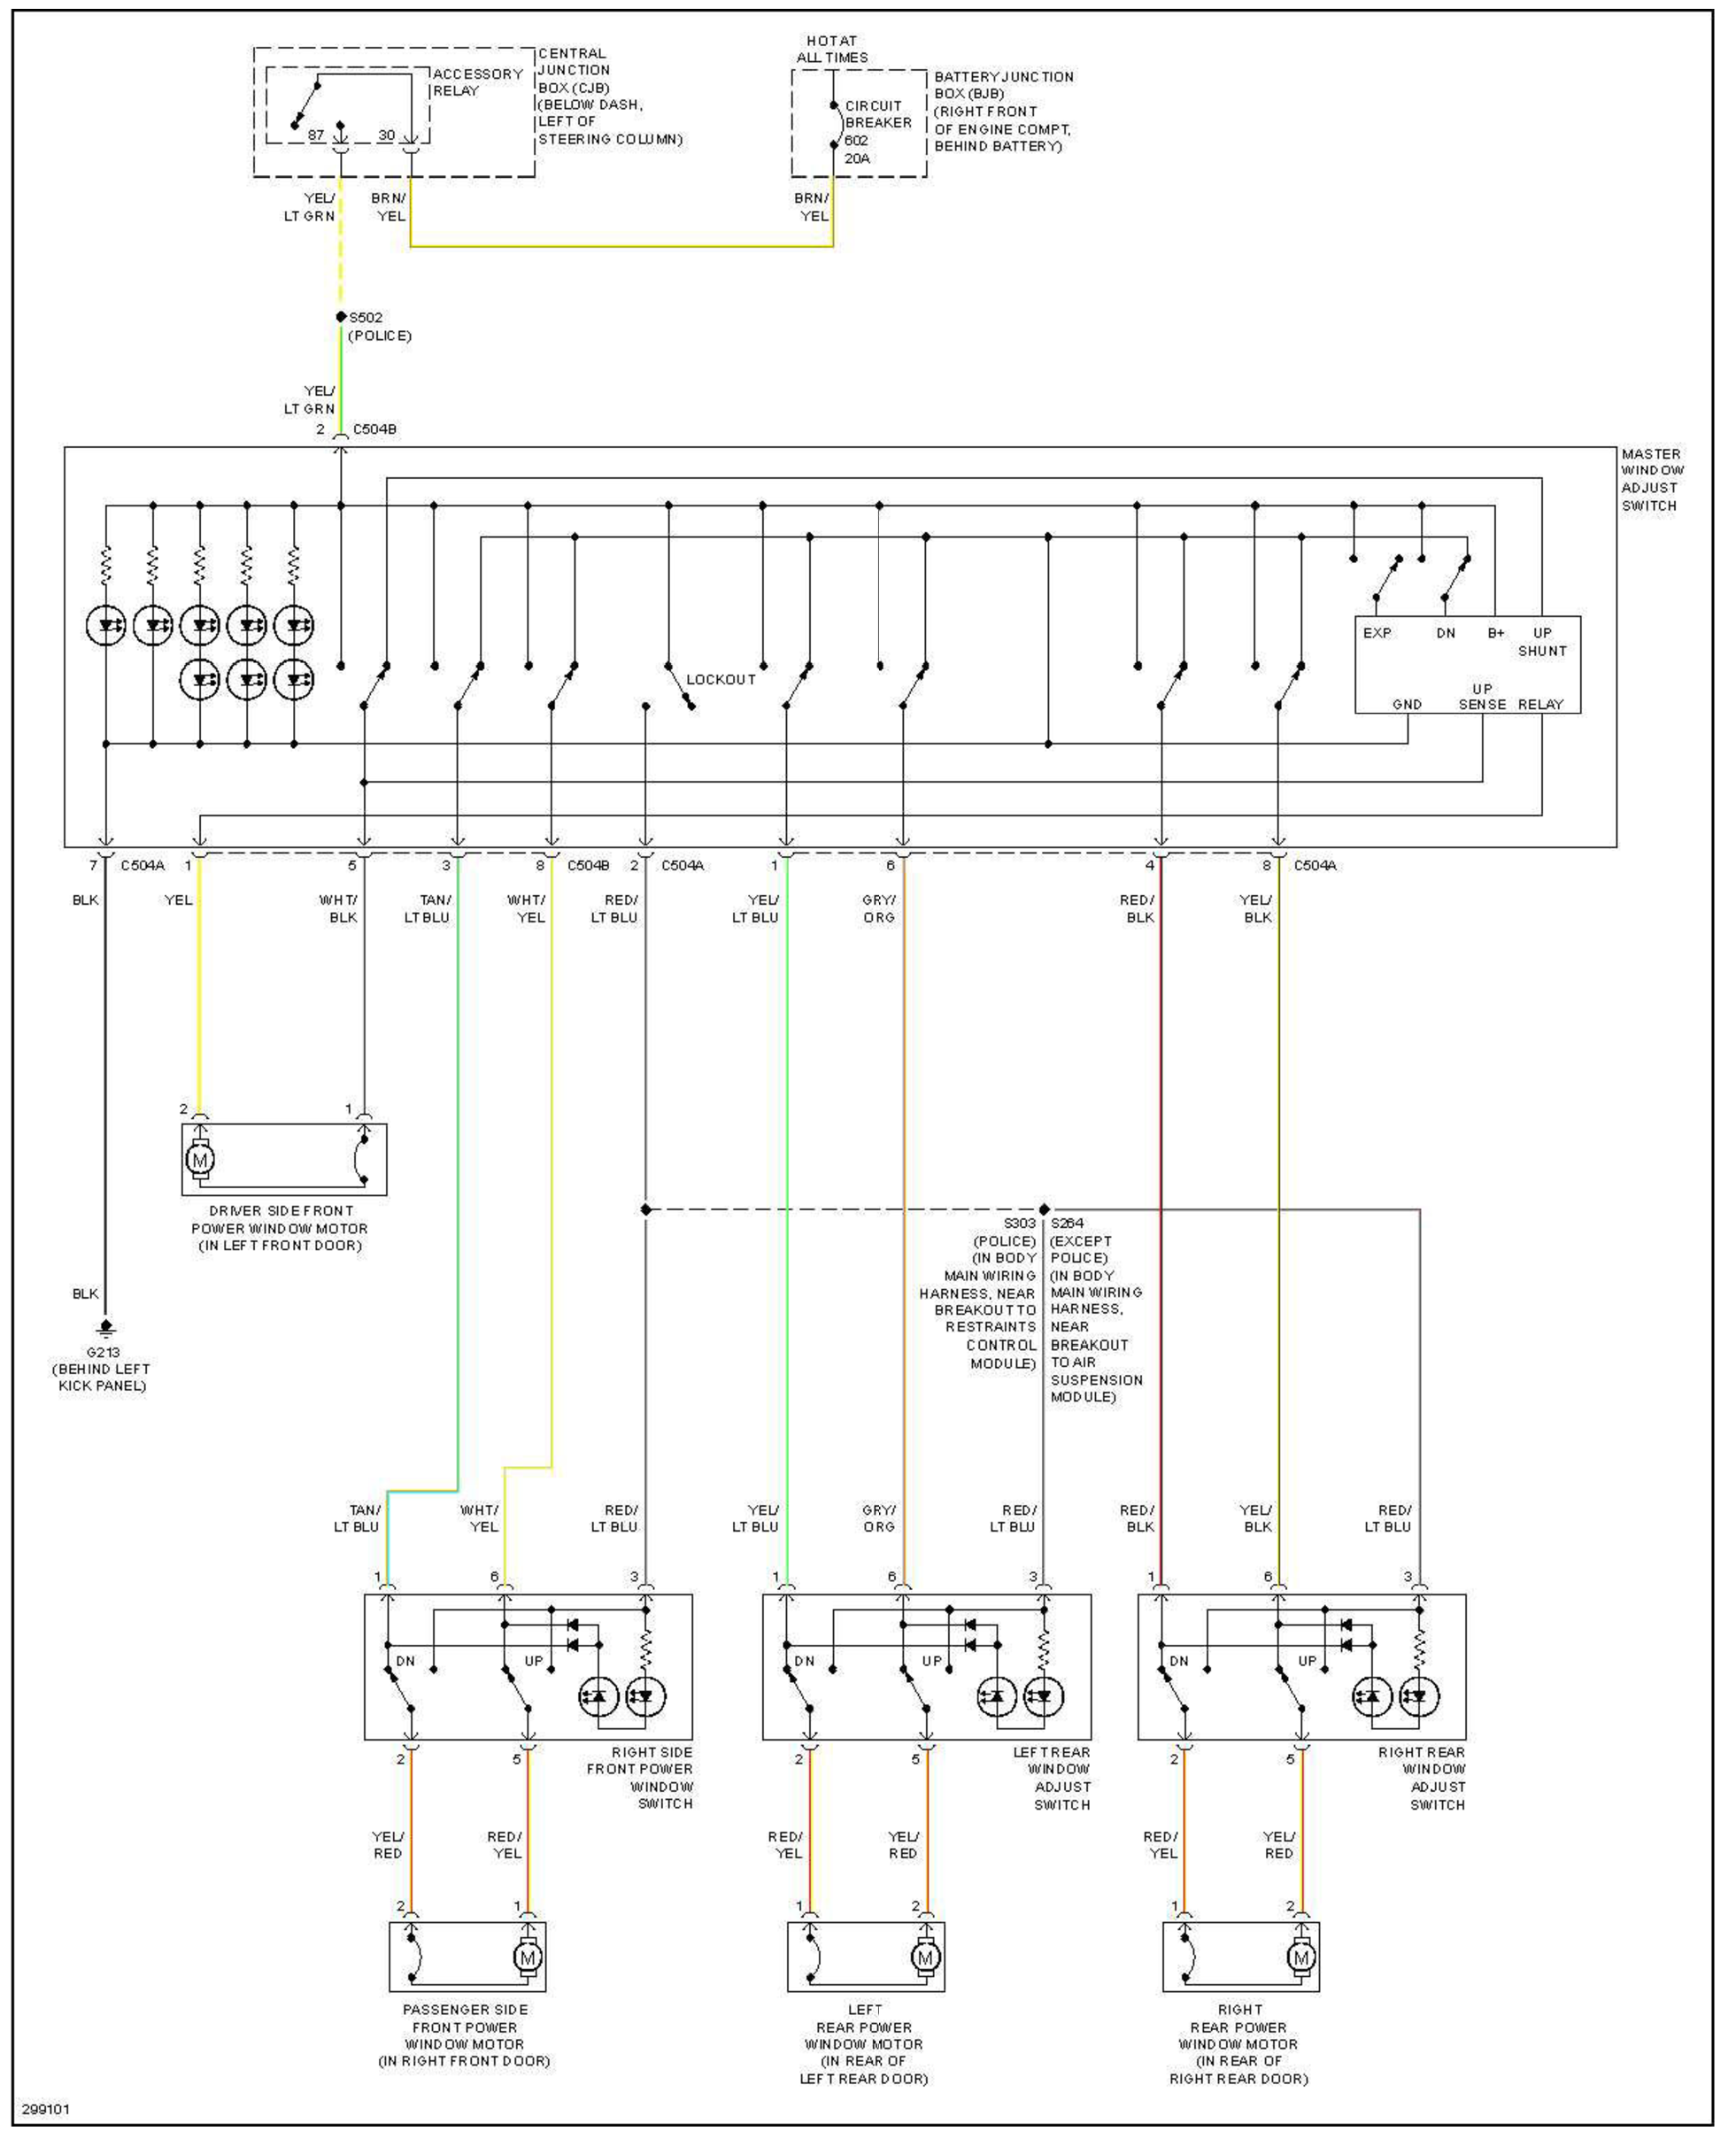
2009 ford crown victoria lx:
How to change out the driver's window switches:
This consists of two connectors with a lot of wires. Be careful to keep track of what is going where. Pins will move between the two.
The forward connector is the same between years but pinned differently. Just need to un-pin, arrange pins, re-pin.
| pin | stock connector wire color | new wire color |
| 1 | gry/org | yel |
| 2 | yel/lt blu | Yel/lt grn |
| 3 | red/blk | tan/lt blu |
| 4 | yel/blk | n/c |
| 5 | wht/blk | wht/blk |
| 6 | yel | n/c |
| 7 | tan/lt blu | n/c |
| 8 | wht/yel | wht/yel |
The rear connector is different. un-pin old connector, connect up a wpt-485 as follows:
| pin | stock connector wire color | WPT-485 wire color |
| 1 | n/c | yel/lt blu |
| 2 | n/c | red/lt blu |
| 3 | n/c | n/c |
| 4 | n/c | red/blk |
| 5 | blk | n/c |
| 6 | n/c | gry/org |
| 7 | red/lt blu | blk |
| 8 | yel/lt grn | yel/blk |
Confusingly, the plugs are called opposite names on the above wiring diagrams between years.
On the 2003 diagram, the forward plug is called C504A, the rear C504B.
On the 2009 diagram, the forward plug is called C504B, the rear C540A.
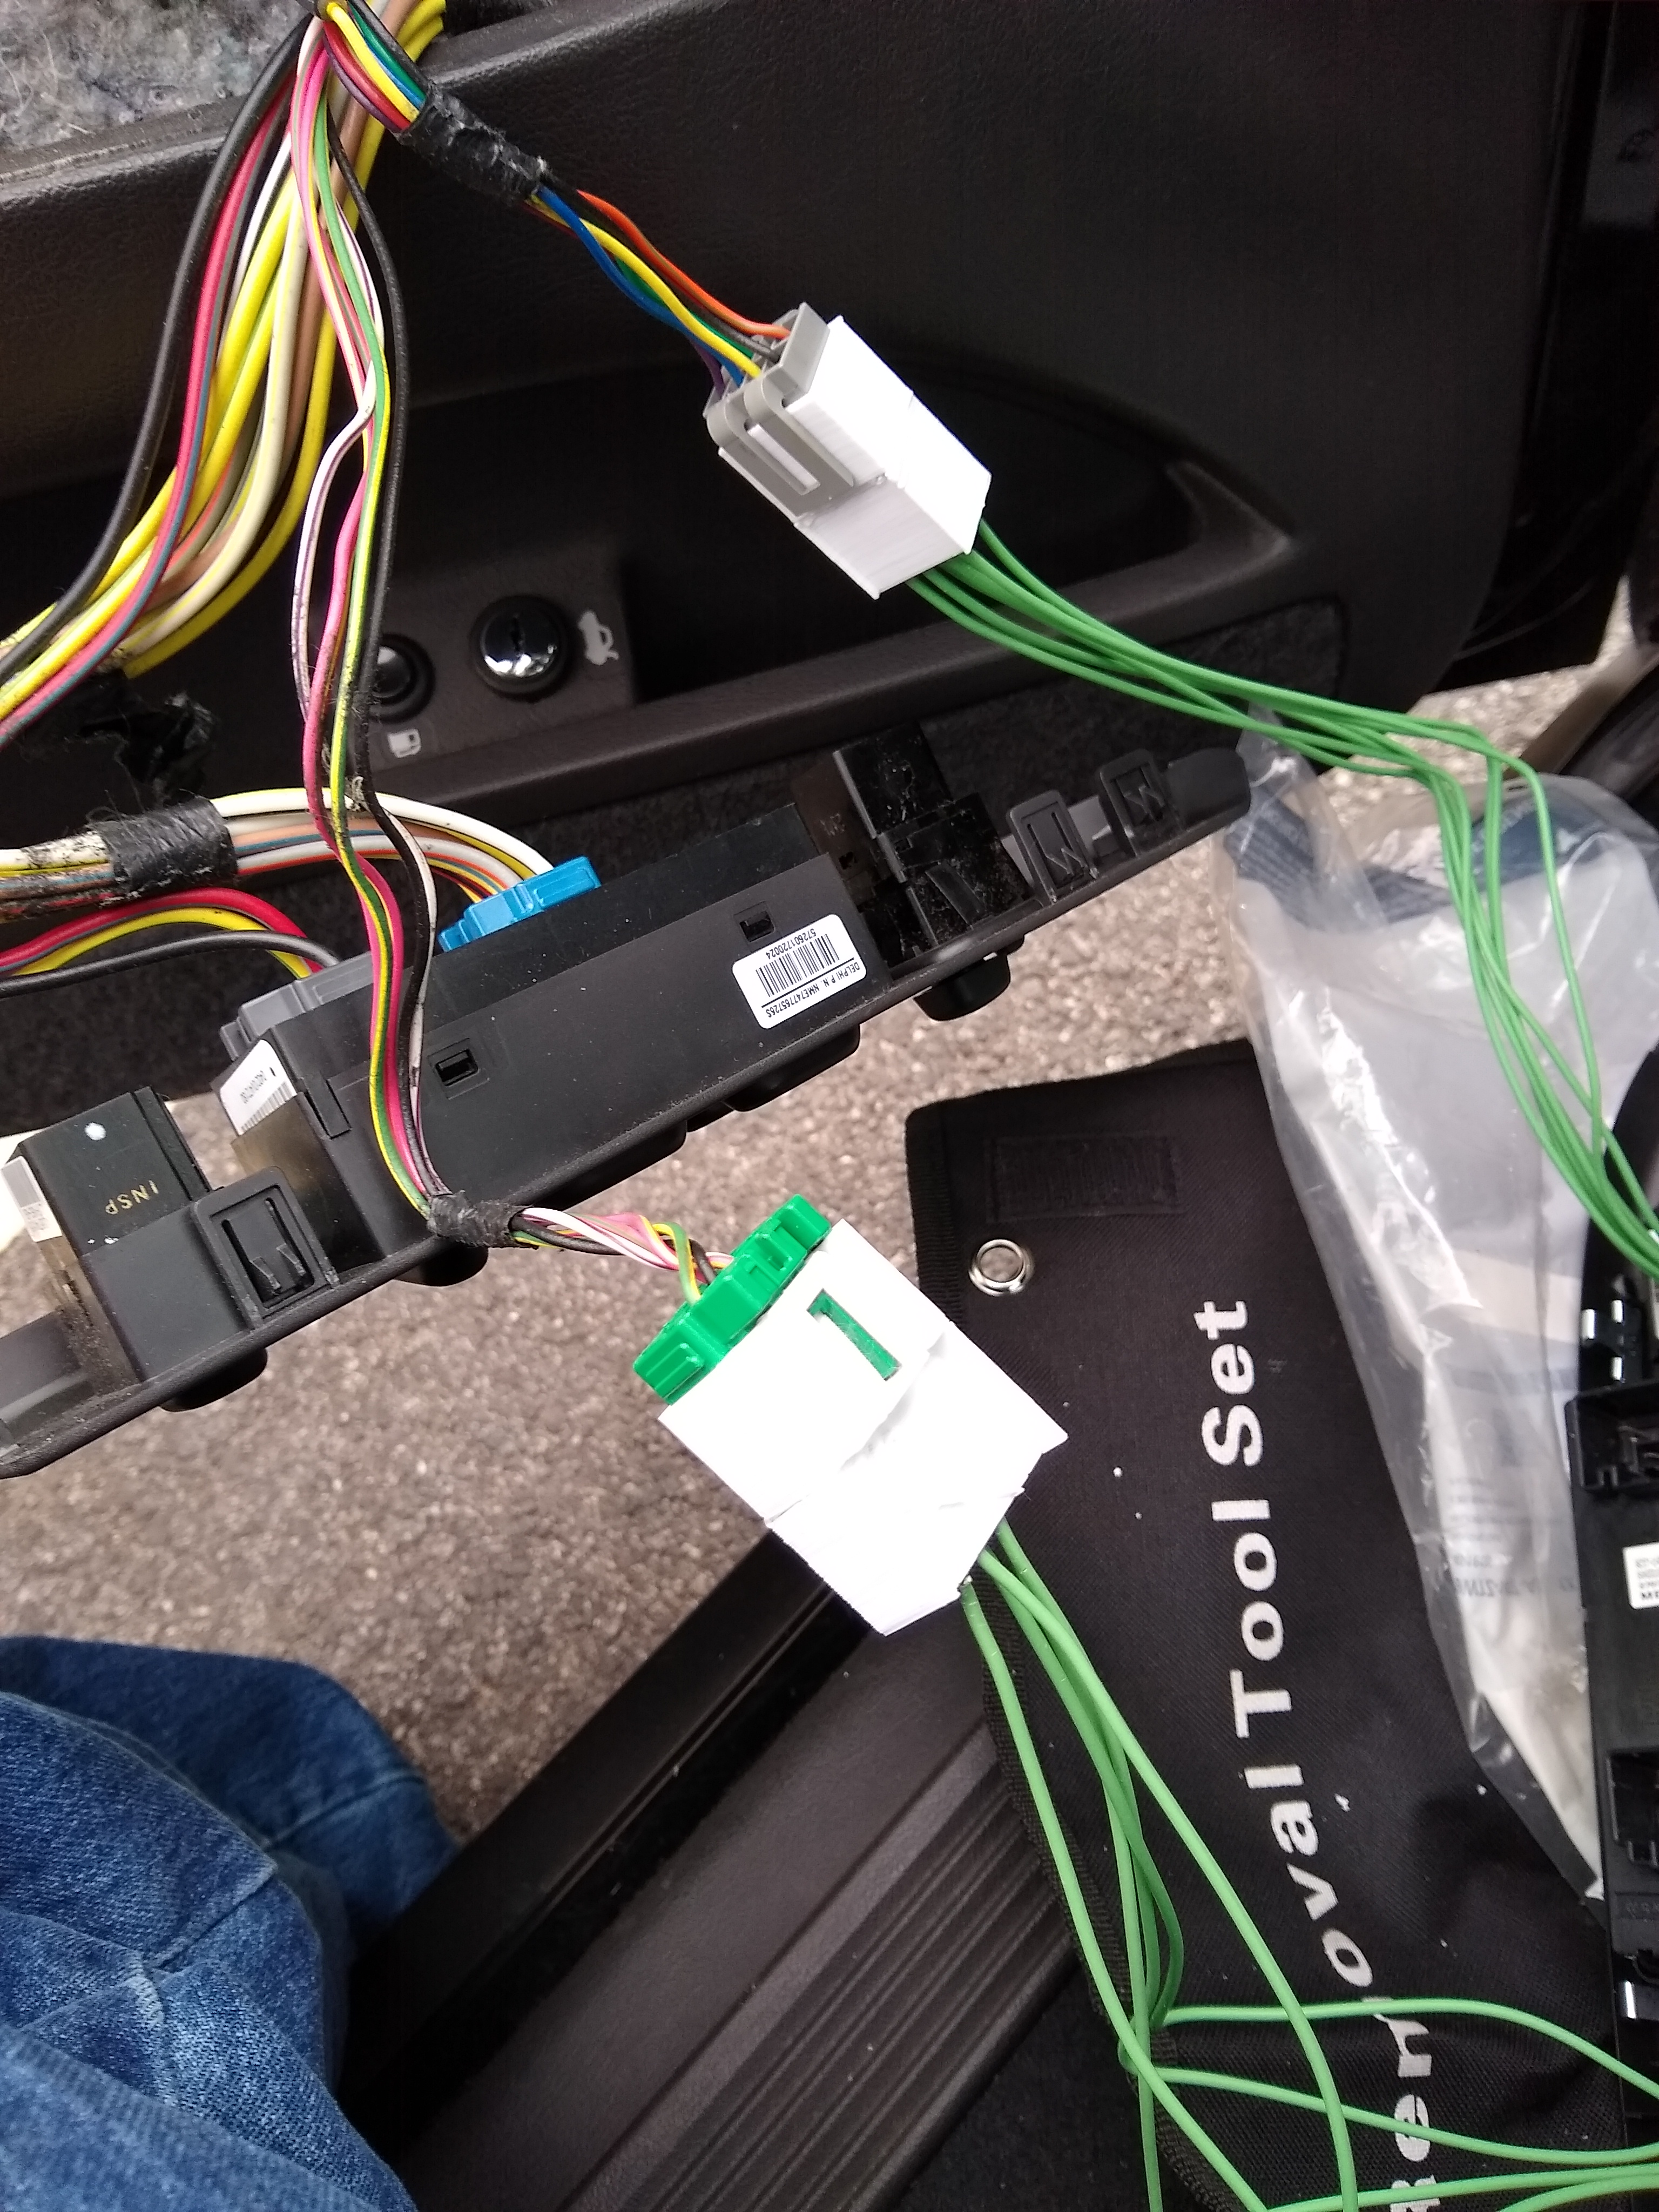
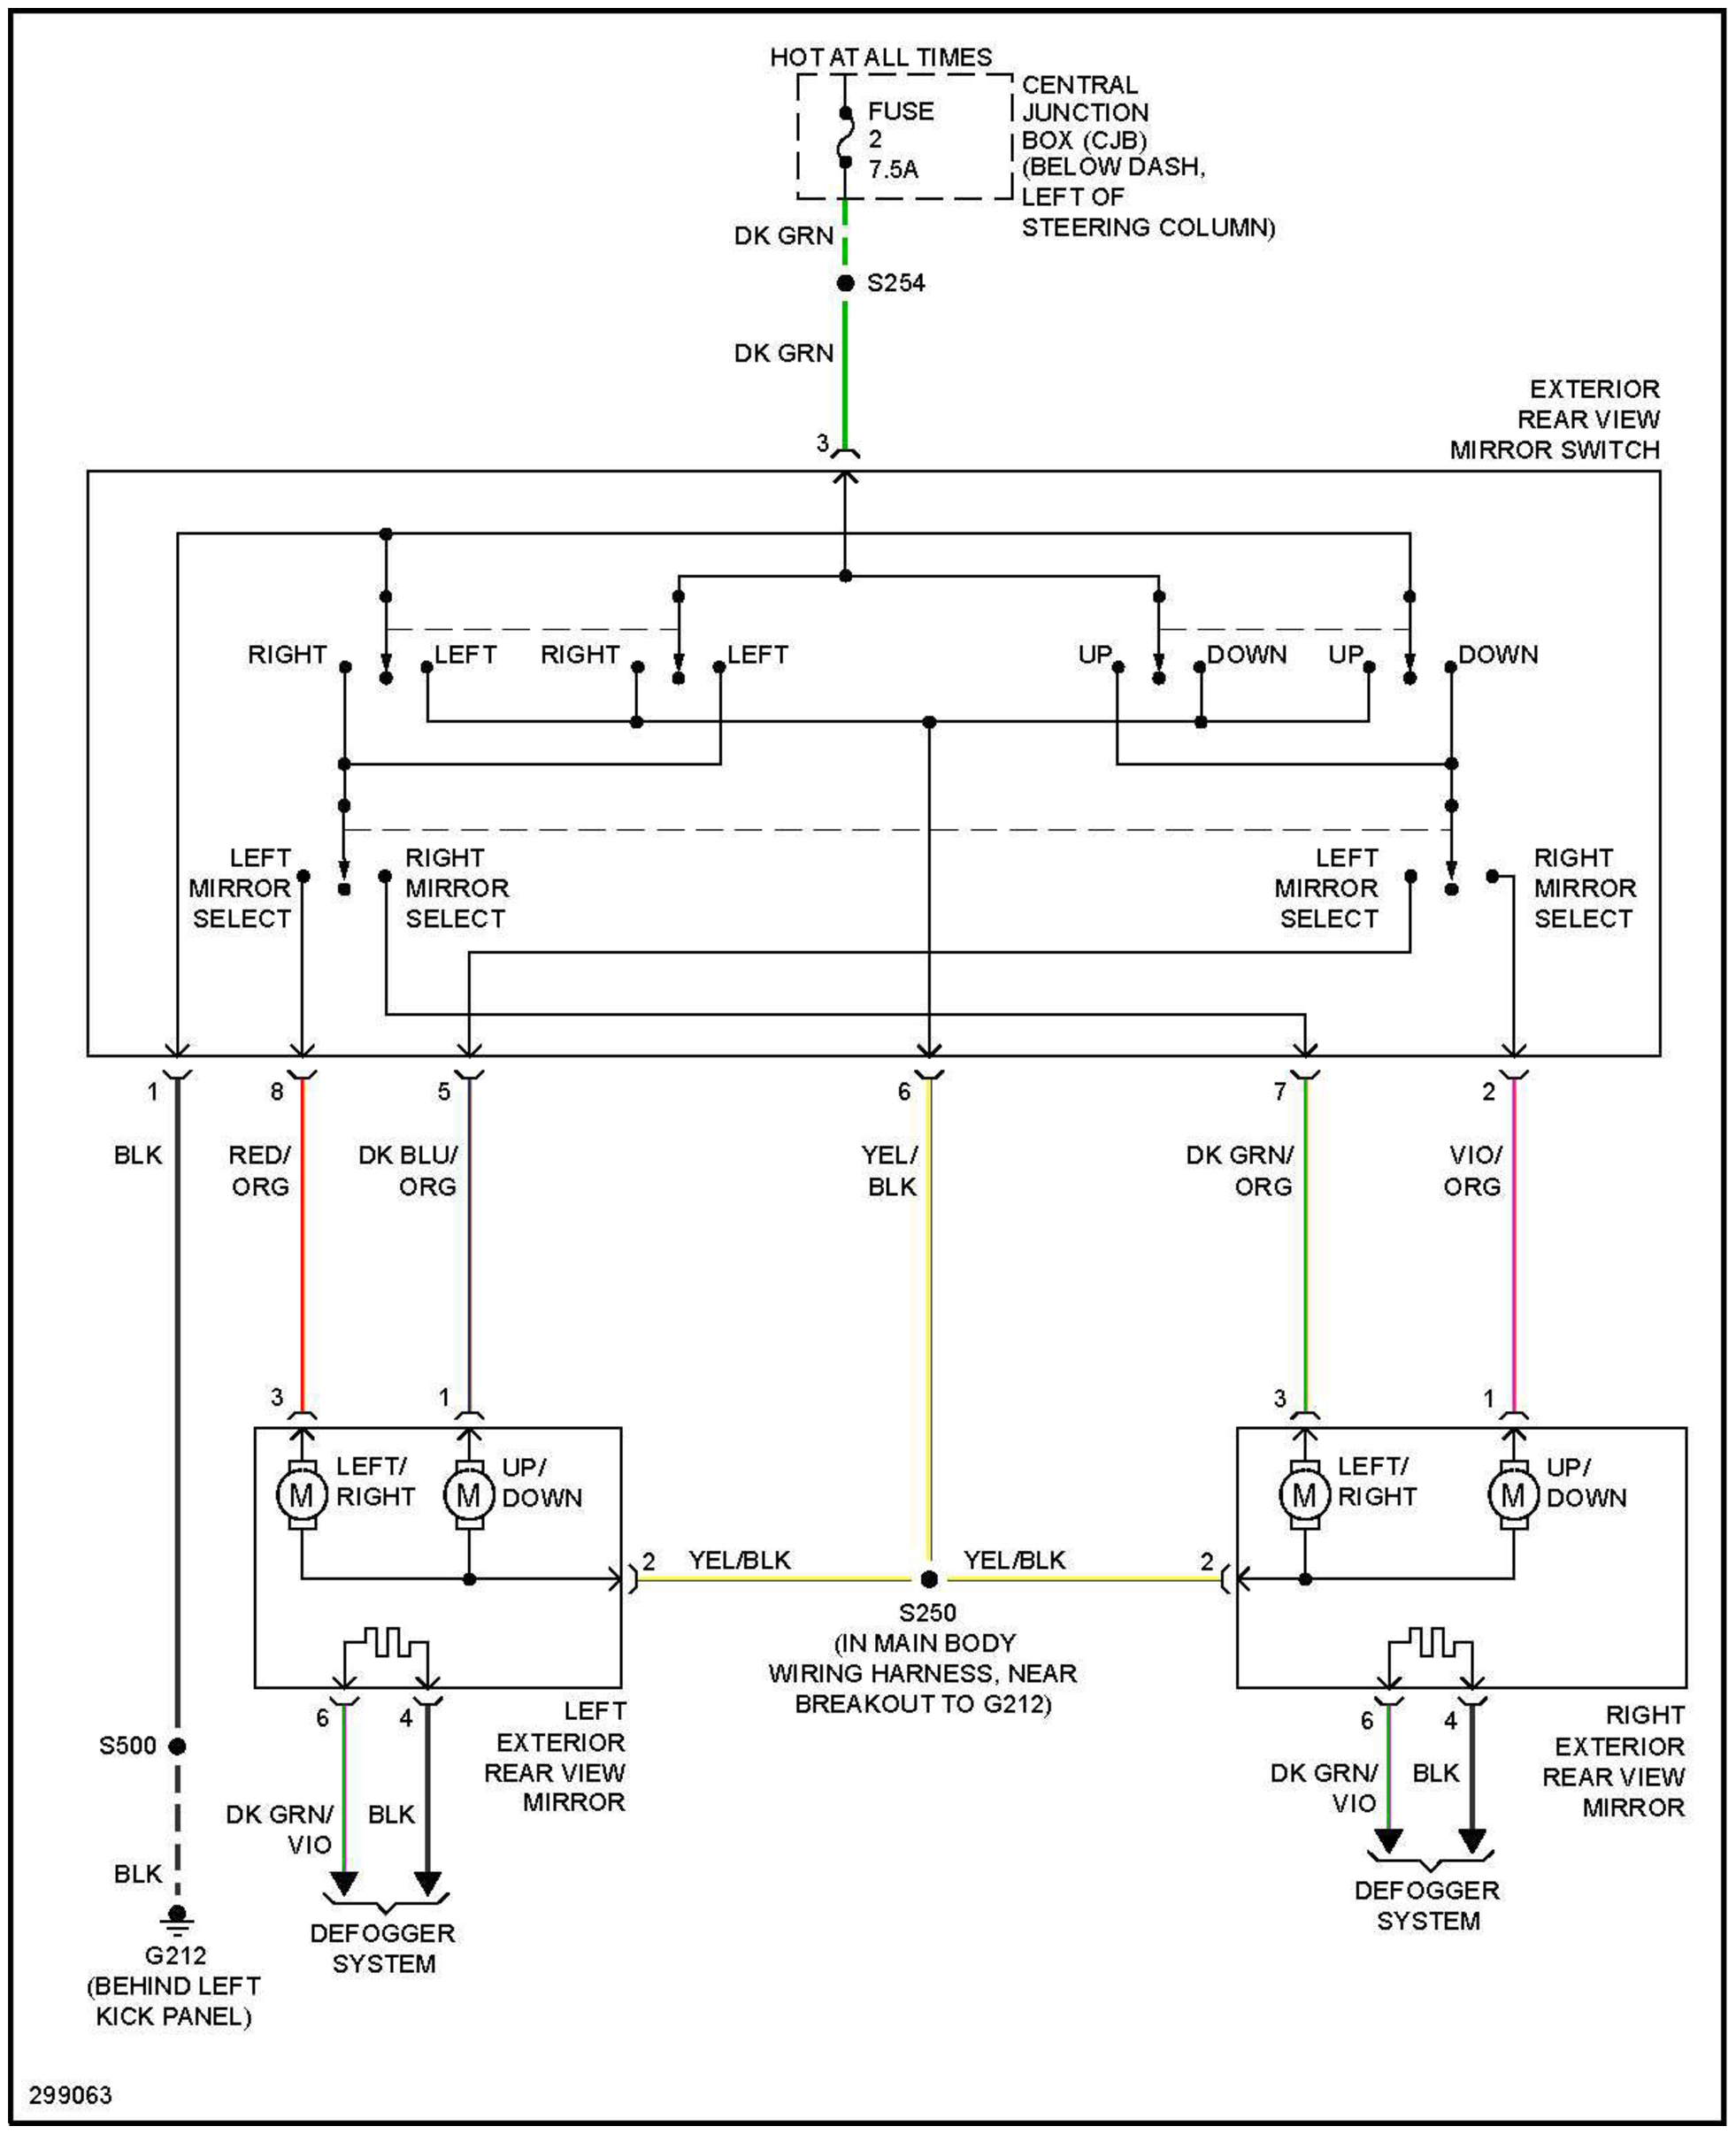
How to change out the driver's mirror control:
These connectors use different terminals. Re-pinning is not possible. The male connector (the plastic housing connector that is attached to the stock switch) is unavailable from ford by itself. Someone must make it but I don't know who.
There are several methods to tackle this problem:
1) The stock plug could be cut off and then strip, solder, and shrink the wires to the wpt-998 pigtail.
2) Order the male terminals from dorman (part number 85347 ), strip and crimp them onto the wpt-998 pigtails wires, then:
2a) de-pin the stock connector, connect the male and females terminals then shrink tube them together.
OR
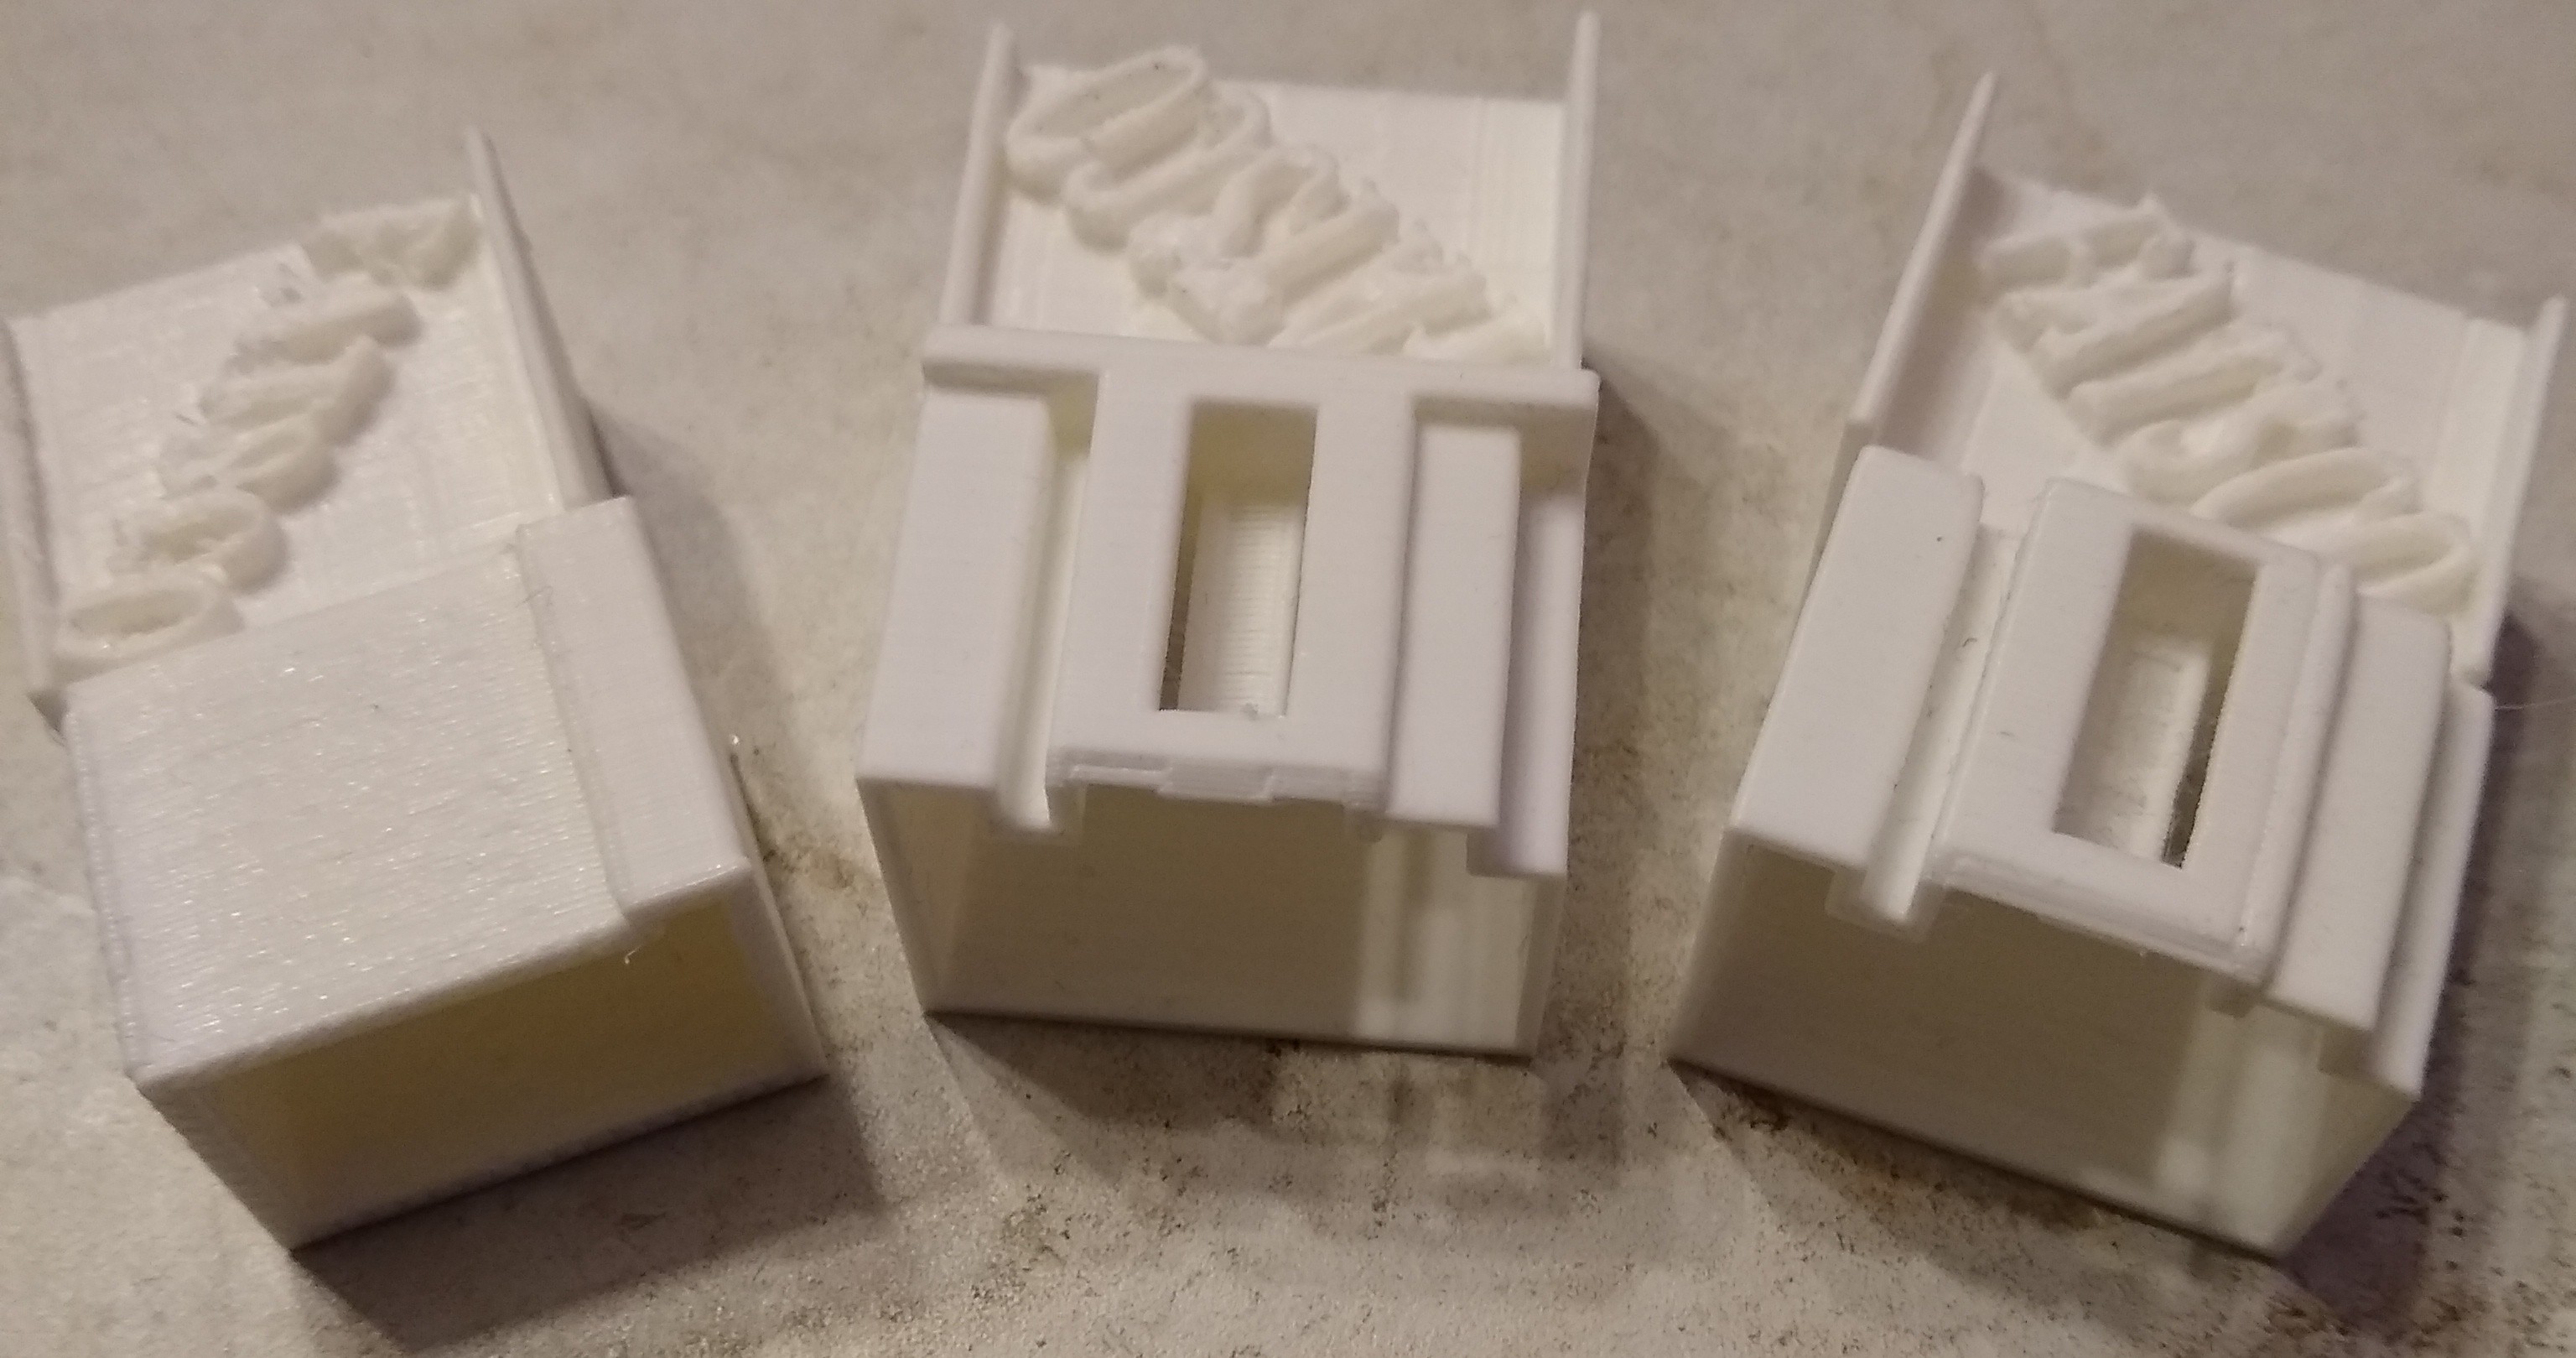
2b) Download and 3d print these connectors. Use them as an adapter. After printing both sections, pin the connector back, super glue on the front, connector on to the stock connector
2003 lock switch connector in STL format
2003 mirror connector in STL format
OR
2c) the crimped male terminals could just be pushed into the stock connector but it won't hold together very well and the metal is exposed and could short. NOT RECOMMENDED.
| pin | stock connector wire color | WPT-998 wire color |
| 1 | ORG/LT GRN (hot at all times) | BLK |
| 2 | N/C | VIO |
| 3 | DK GRN | ORG/LT GRN |
| 4 | RED | N/C |
| 5 | BLK (ground) | DK BLU |
| 6 | YEL | YEL |
| 7 | DK BLU | DK GRN |
| 8 | VIO | RED |
Marauder:

2009 ford crown victoria lx:
How to change out the driver's and passenger lock switches:
Firstly, the above note about terminal size applies here too.
Secondly, the two switches operate in the opposite method. The 2003 switch switches hot to the lock/unlock lines to trigger it.
The 2009 switch switches ground to the lock/unlock lines to trigger it. It has no always hot line.
There are 2 methods to fix this problem:
1) Wire in some relays. This method is detailed in the Crownvic post linked at the start of this page.
2) Altering the switch itself to switch hot instead of switching ground.
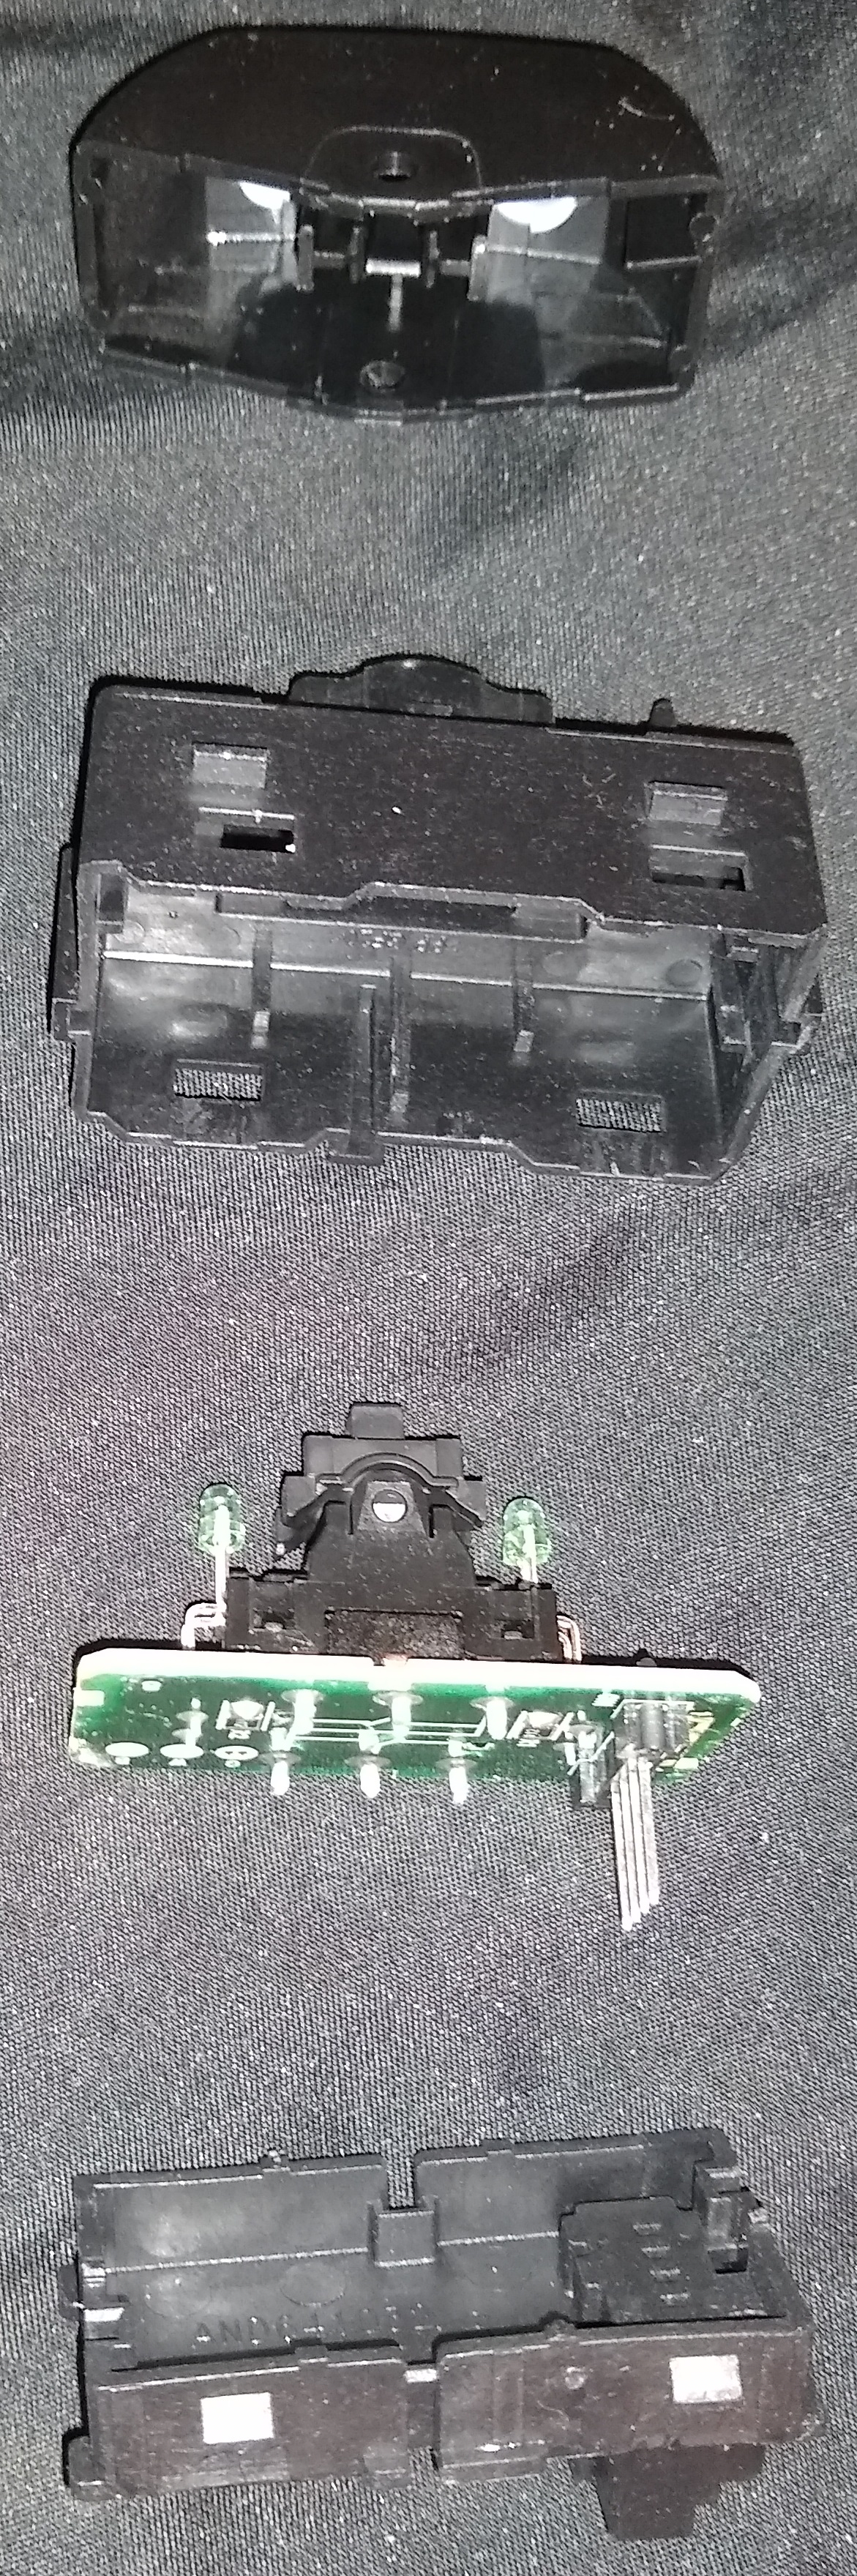
A) Take apart the switch.
Click down the rocker and pry rocker off its pin (1 on each side)
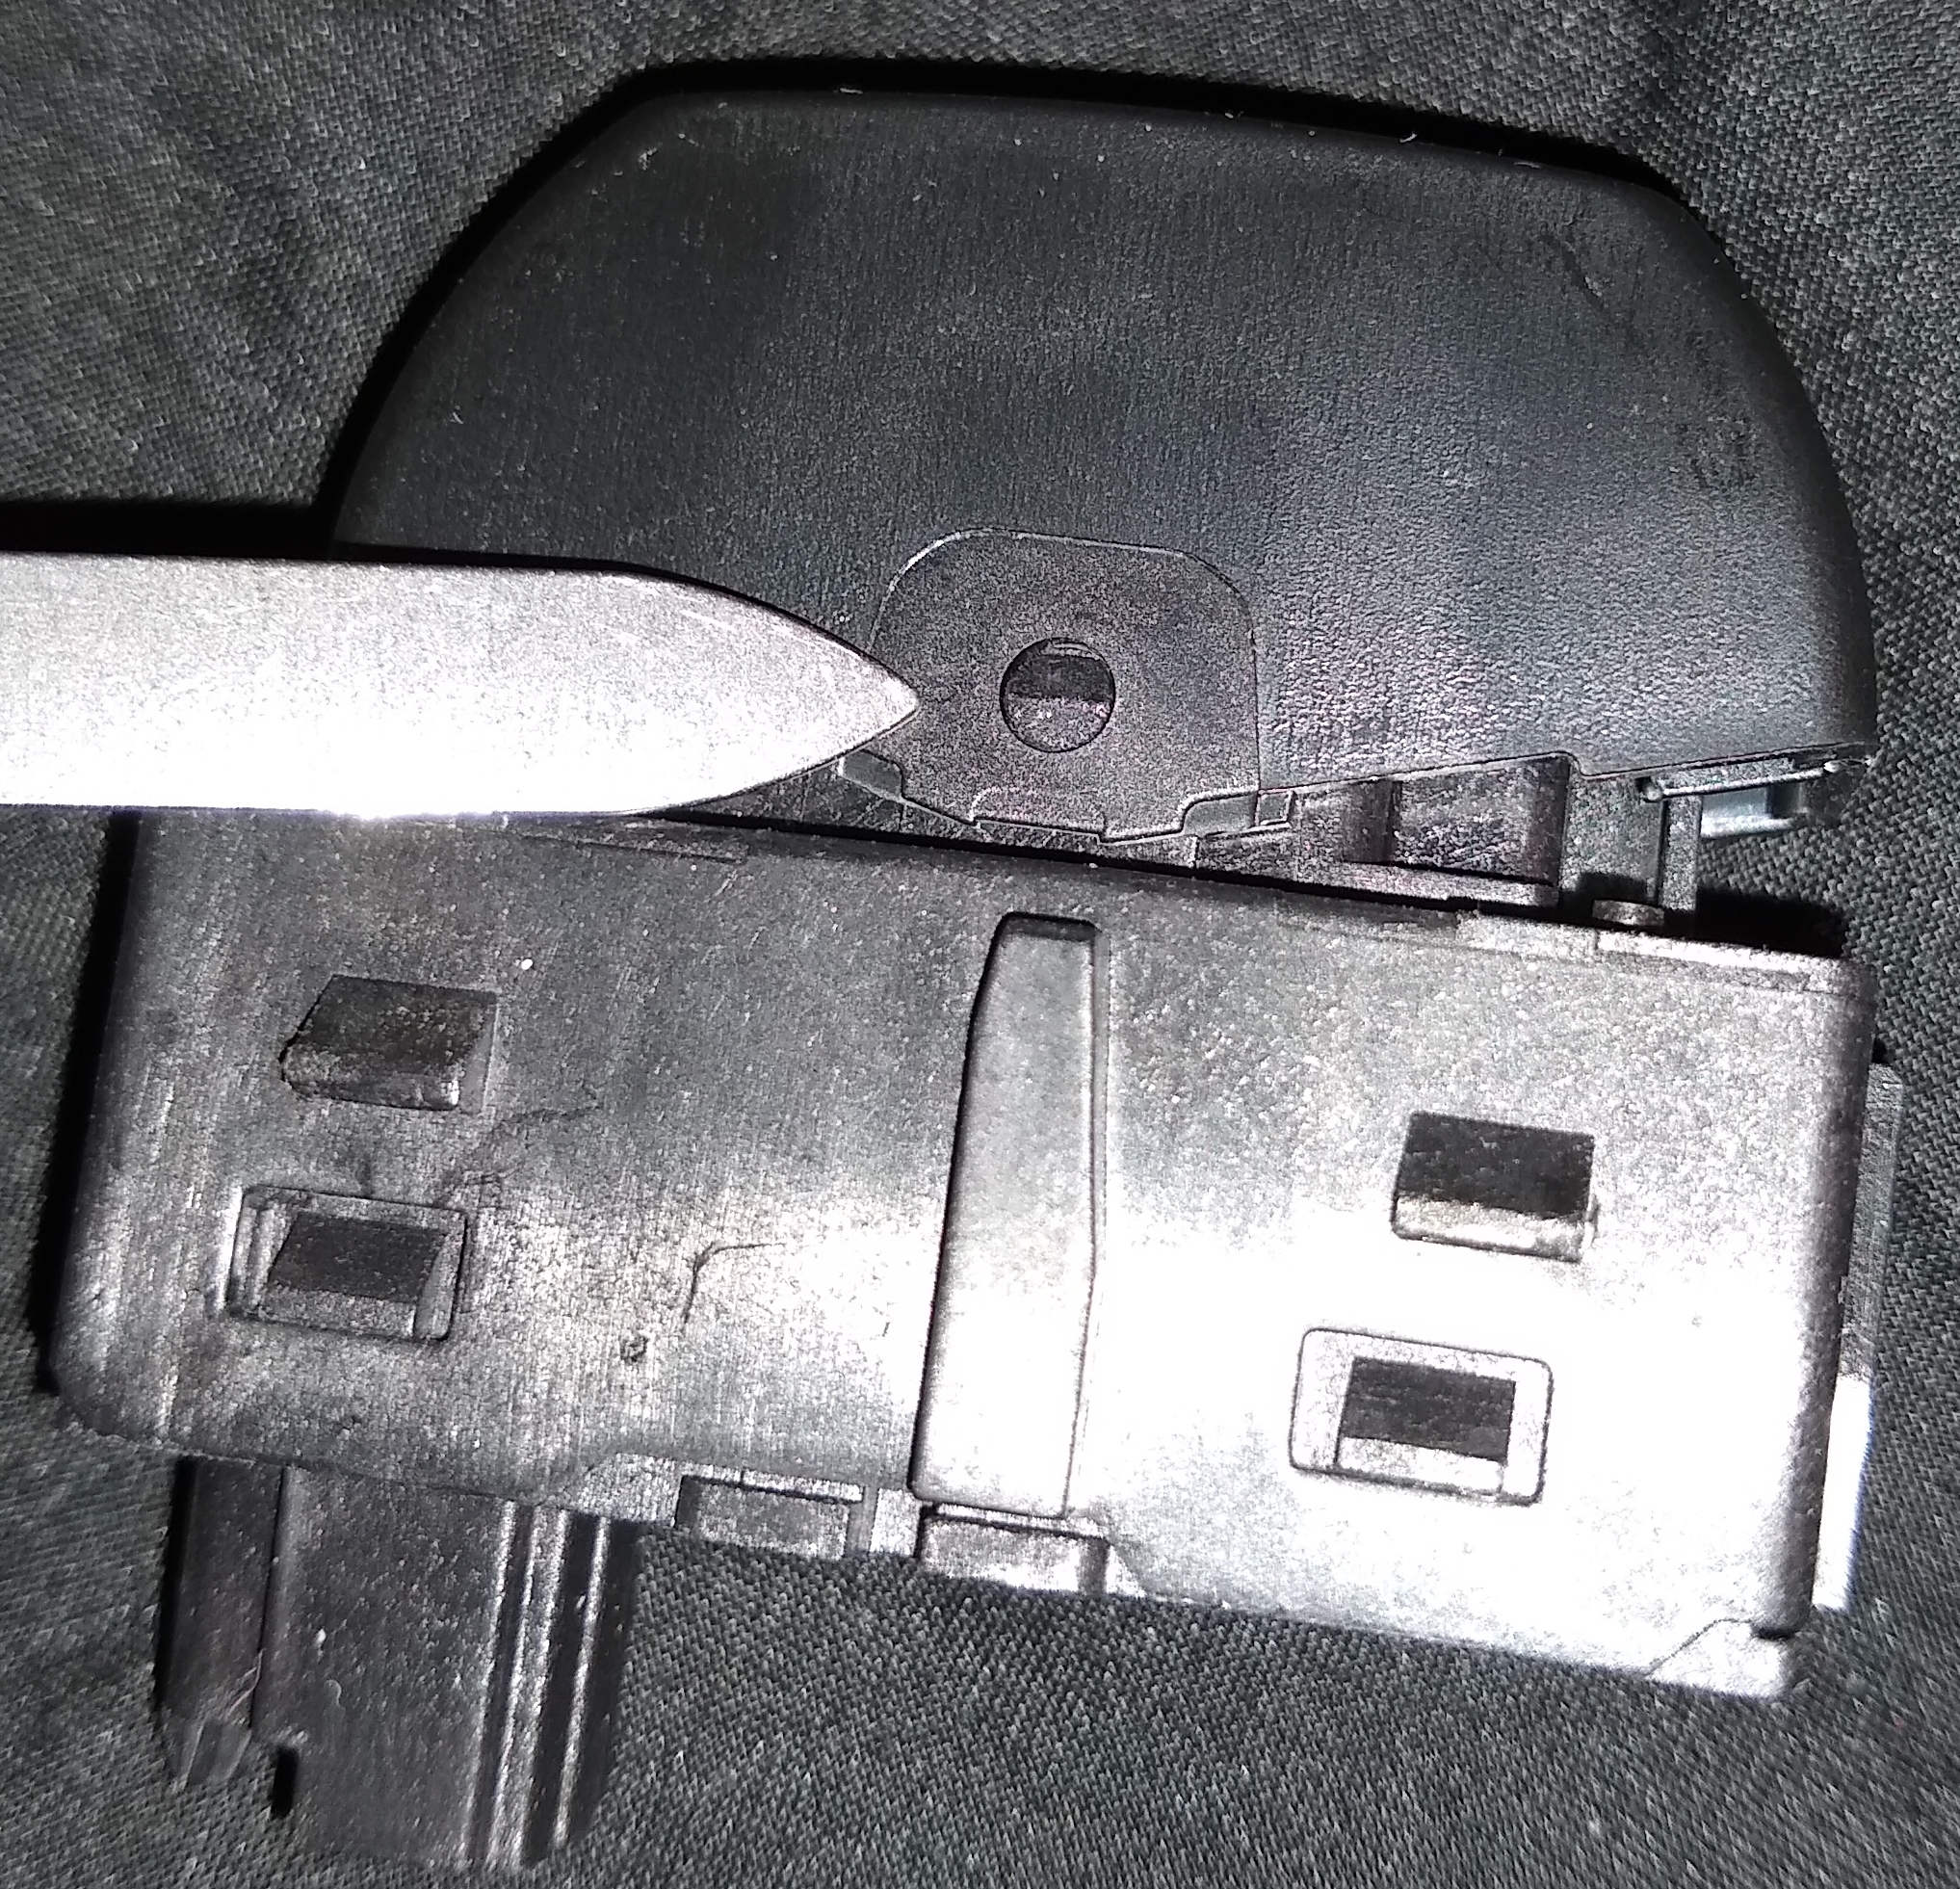
From the bottom, slide something into the groove to raise the sides above the tabs (2 on each side)
Everything should come apart now
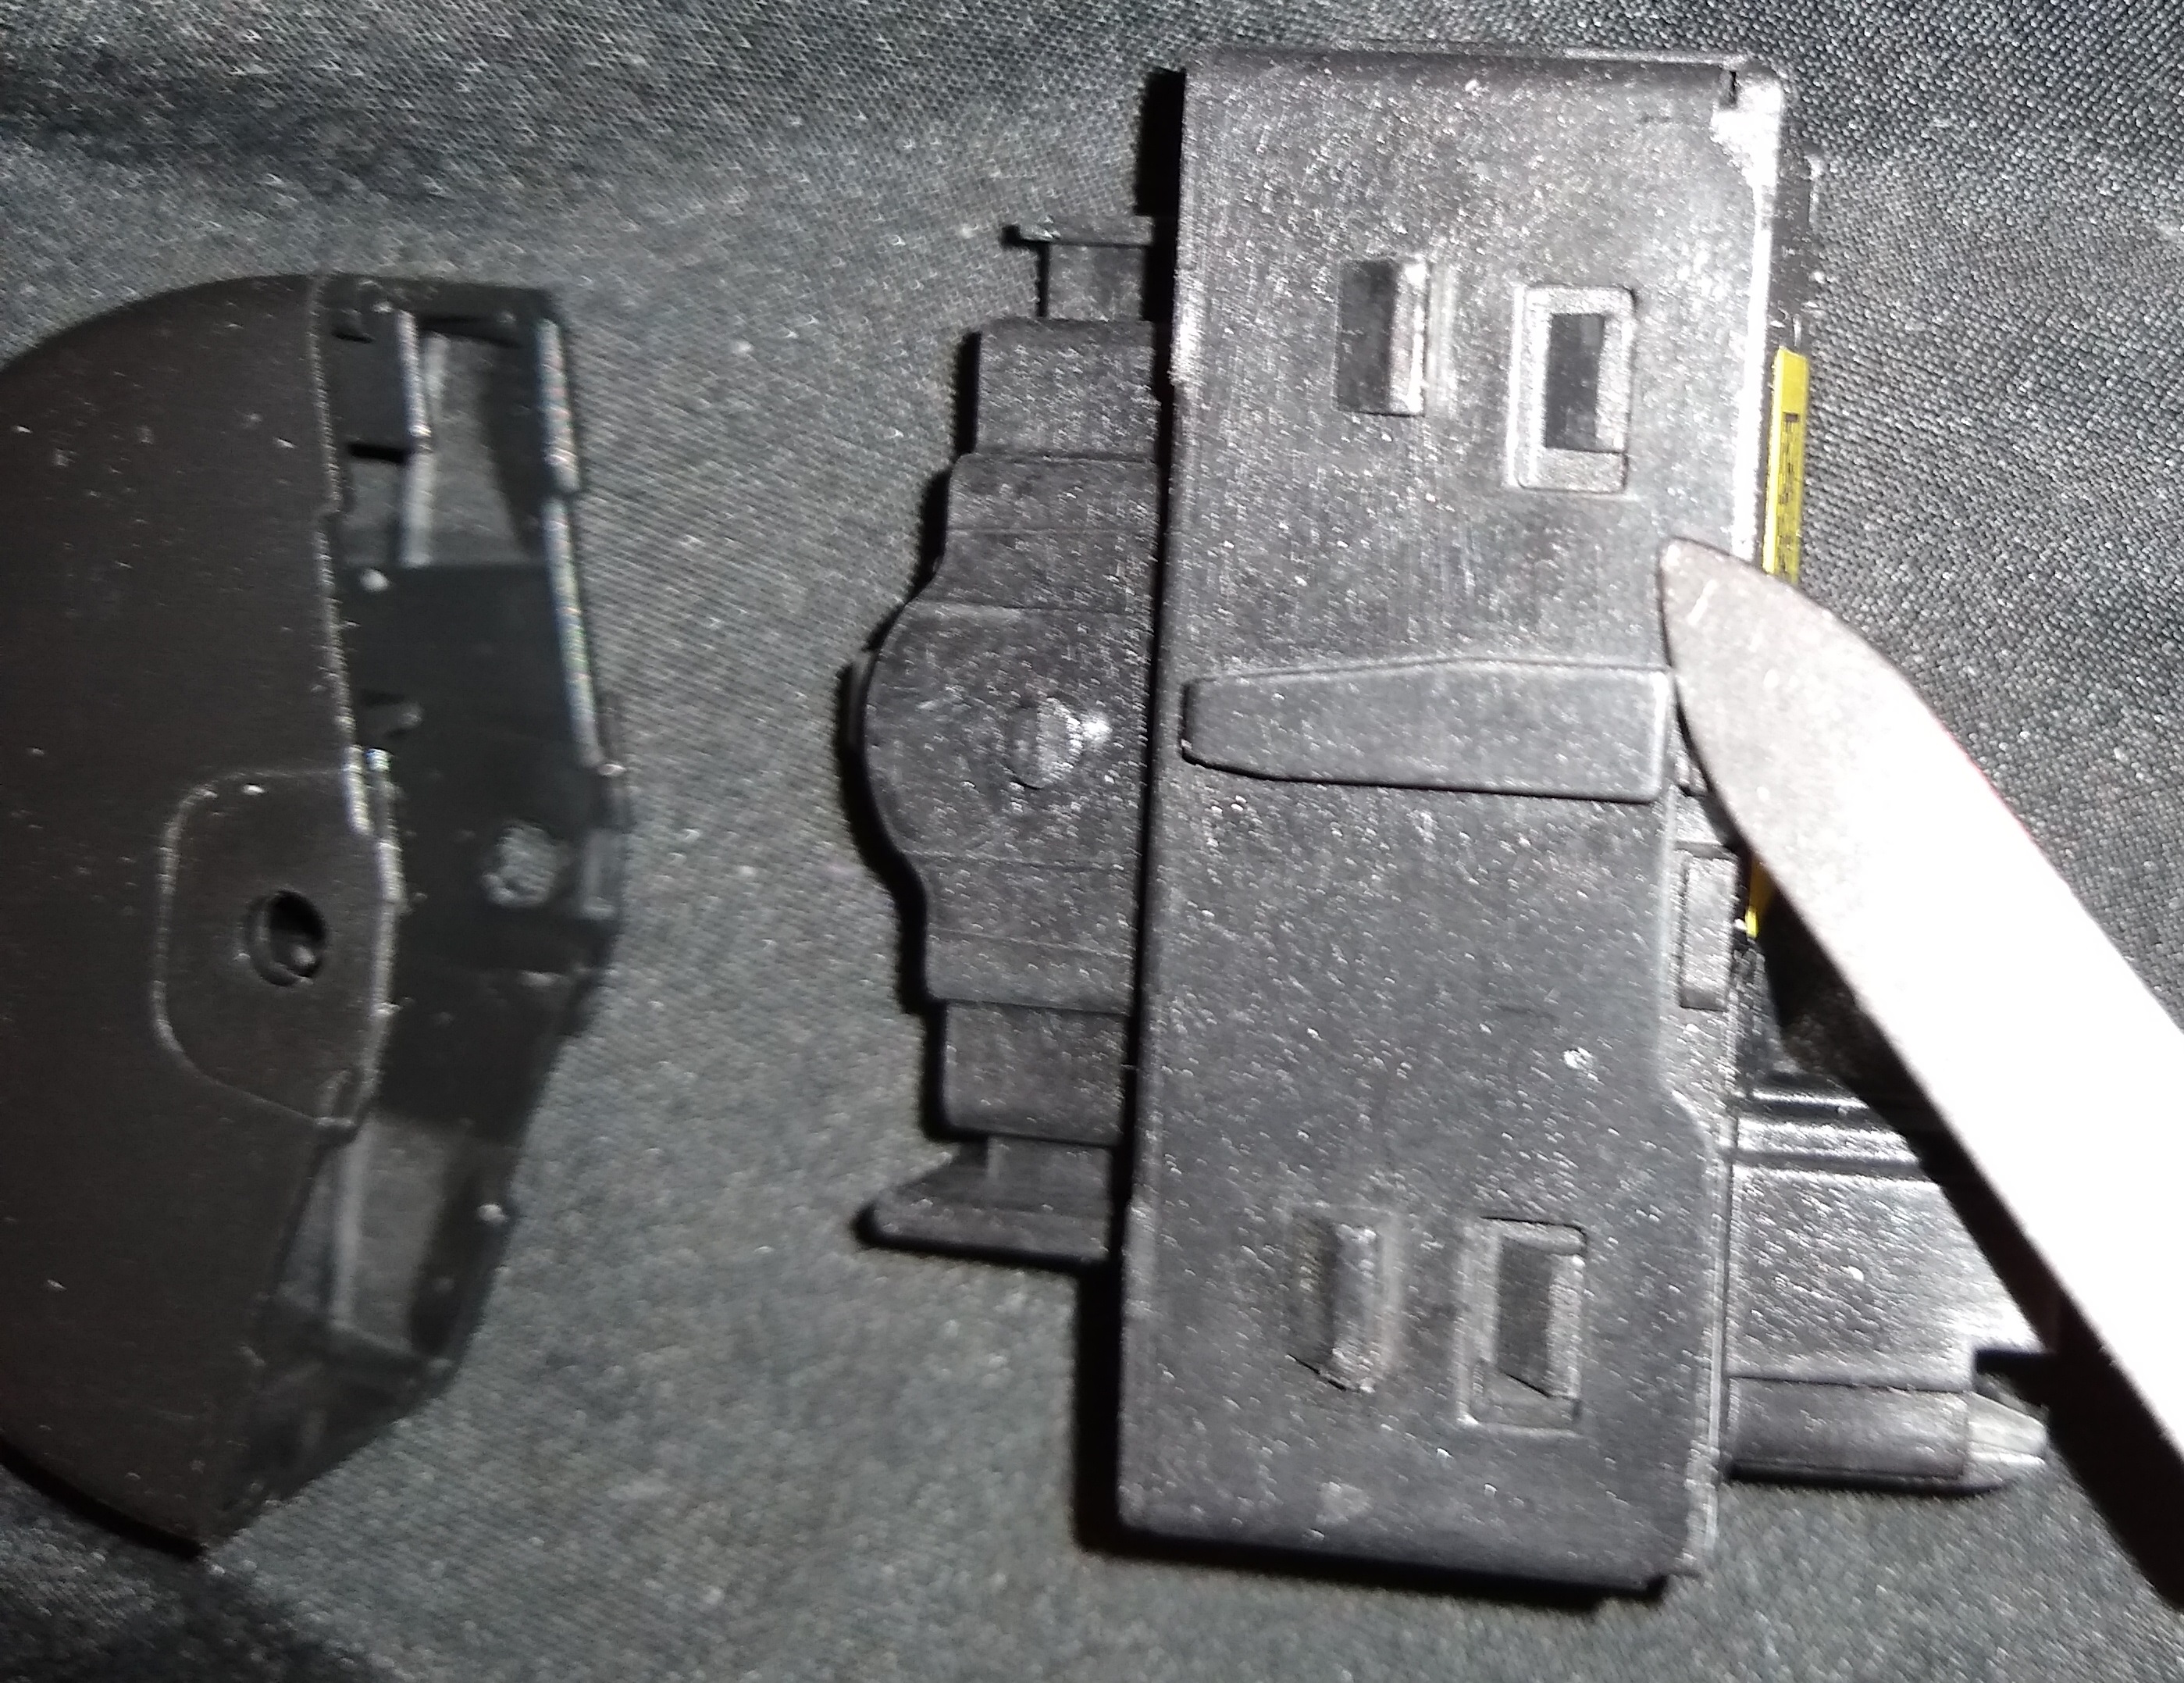
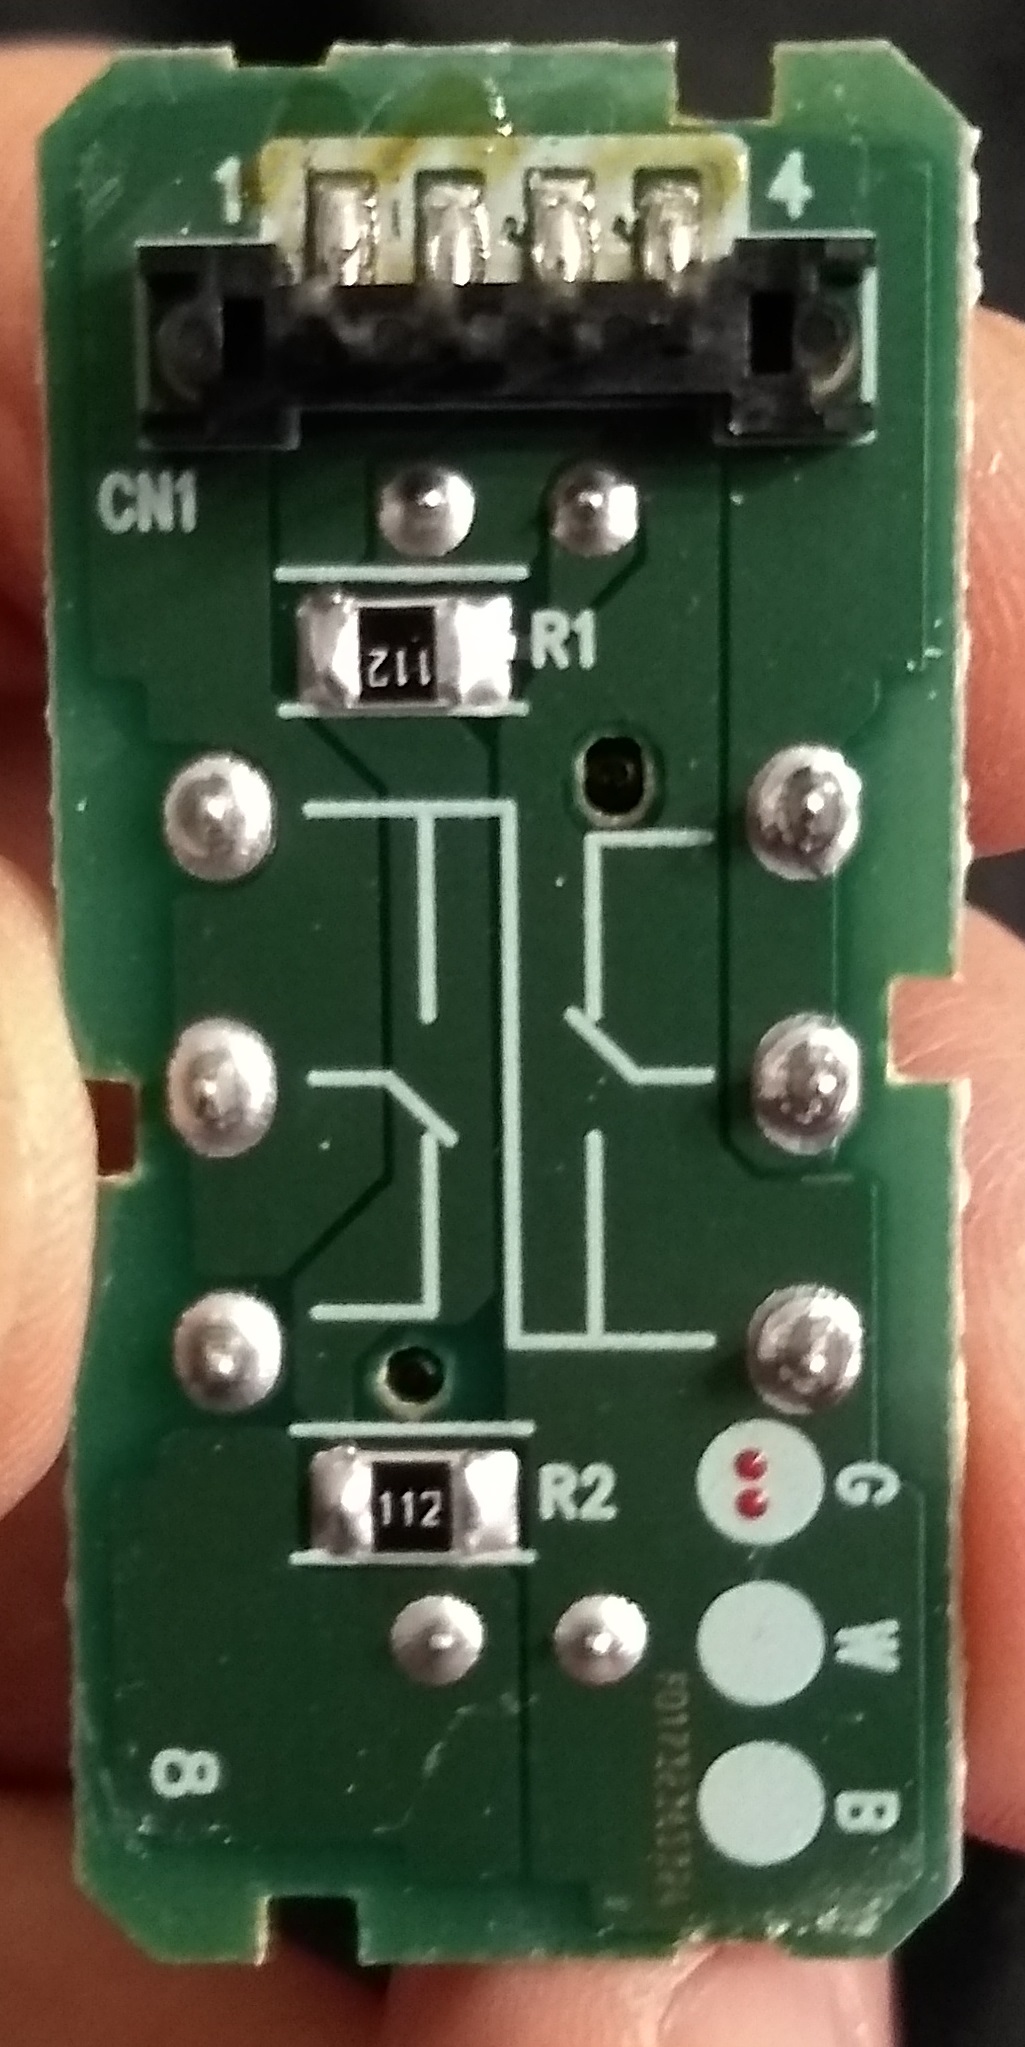
B) Sever pin D from the ground plane that is connected to pin 4. Checked for continuity, it will beep by default.
After scraping away the top layer and the copper, use a multimeter to check for continuity between D and 4. Keep going until there is NO beeping.
Before alterations:
After alterations:
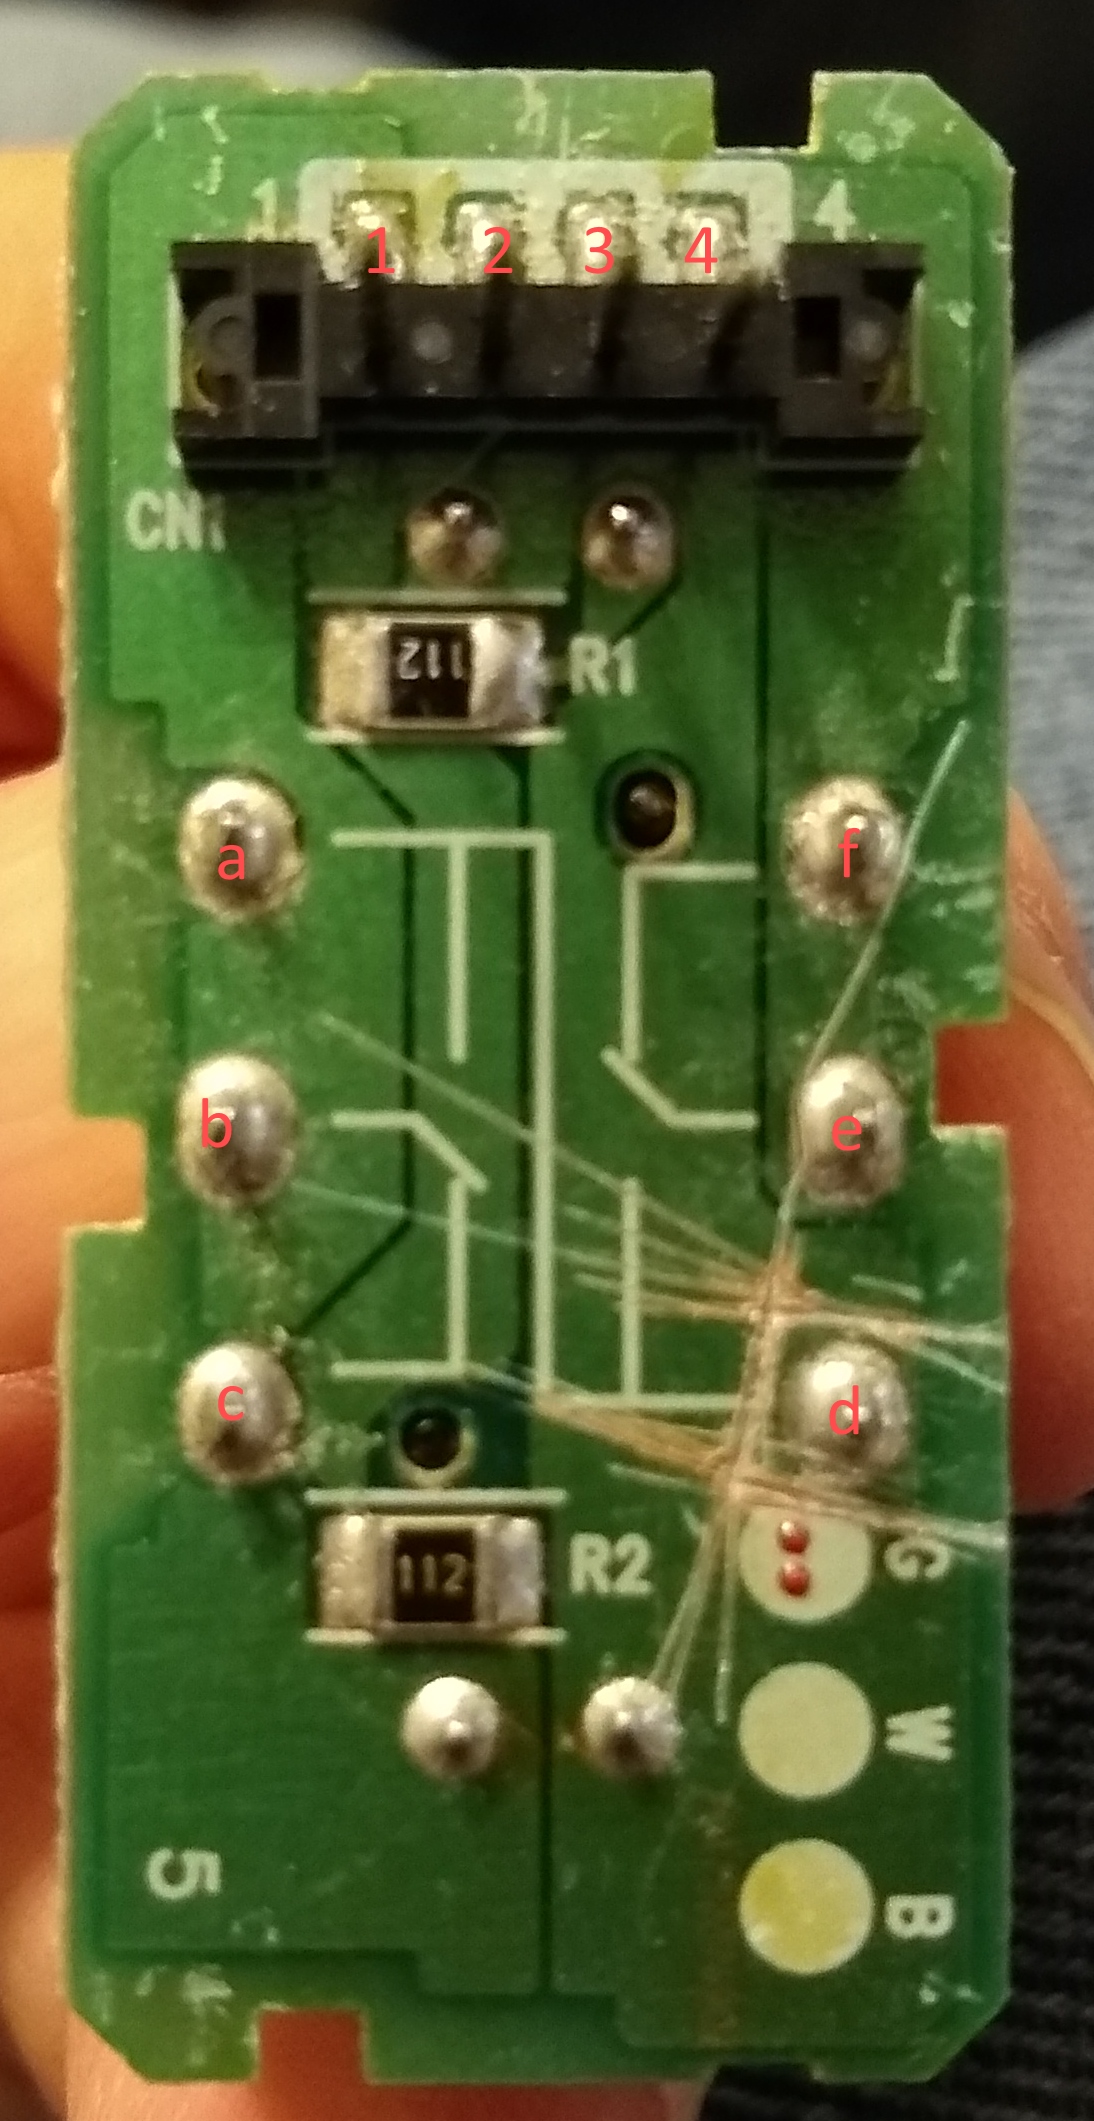
C) Solder on a header pin to pin D.

D) Drill a hole in the bottom case. Slide a wire with a terminal on to the pin, feed wire through the hole. Use hot glue for added support. Check for no continuity again just to be sure, then put it all back together.
You can pop pin 4 out of the WPT-998 mirror control pigtail and use that terminal and wire here. Can also use 3 or 5 from wpt-485 master window switch for the other one but the connector is bigger, be sure it is nice and snug.
E) wire it up as follow. Pin "5" is the wire we just added.
| pin | stock connector wire colors | WPT-982 |
| 1 | n/c | PNK/YEL |
| 2 | pnk/yel (unlock side of the switch) | WHT/VIO |
| 3 | blk (ground for leds) | PNK/LT GRN |
| 4 | lt grn/yel (hot at all times, other side of the switch) | BLK |
| 5 | wht/vio (hot in run or acc, for leds) | LT GRN/YEL (The loose wire) |
| 6 | pnk/lt grn (lock side of the switch) | - |
| 7 | N/C | - |
| 8 | N/C | - |
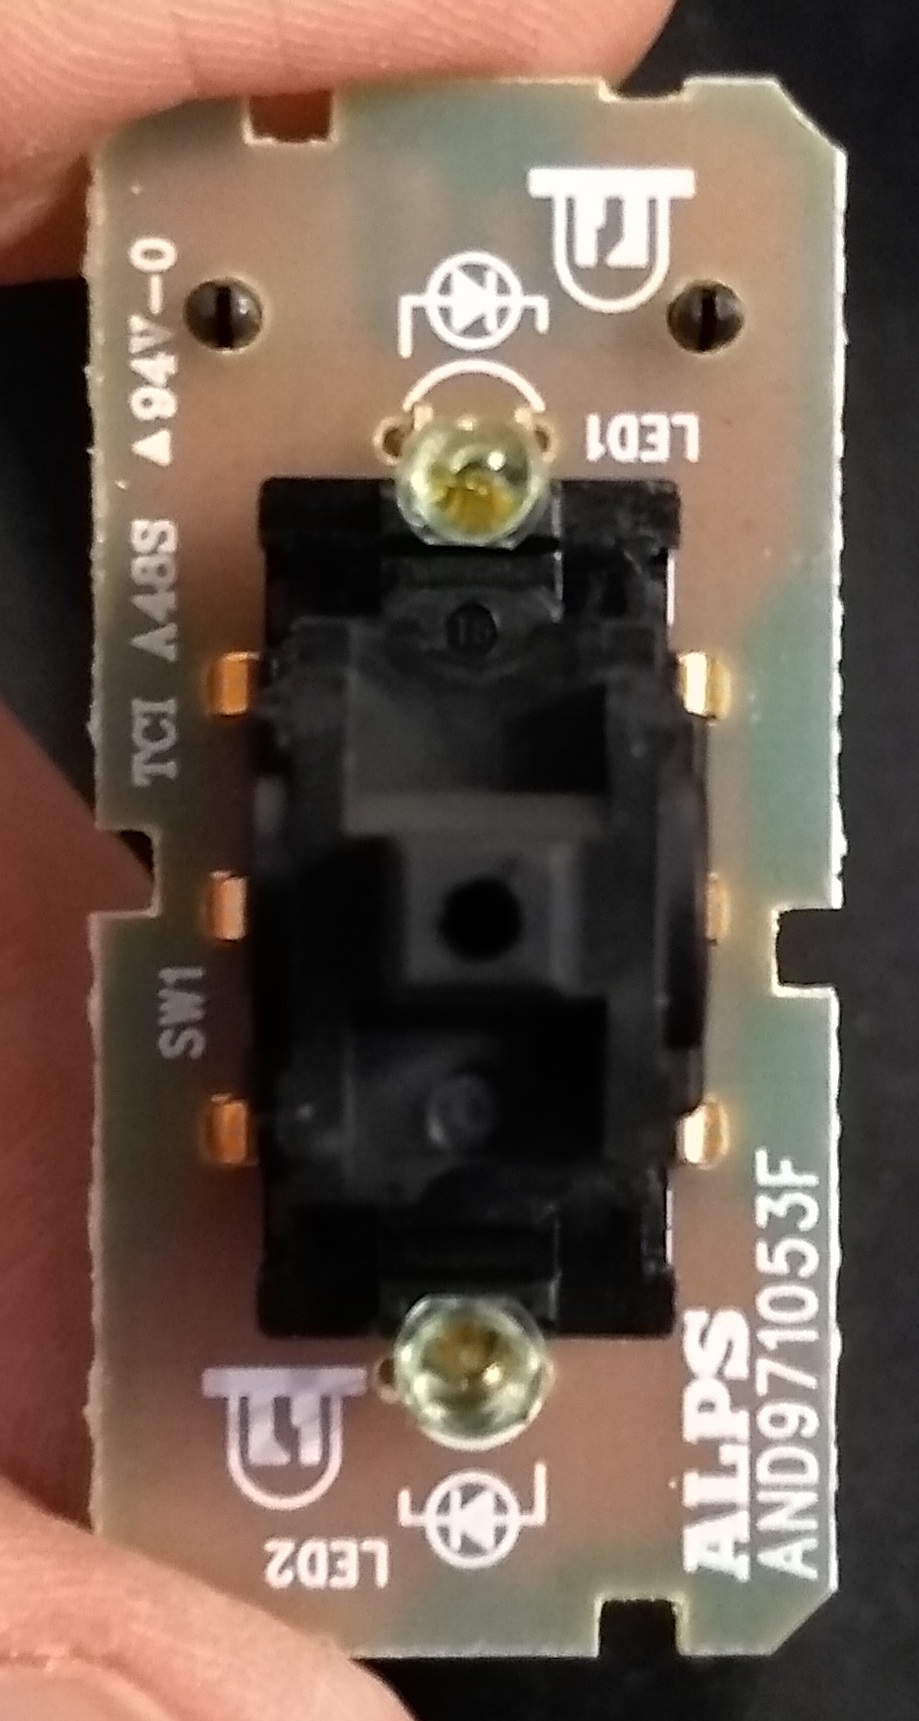
Extra Pics:
The pcb front. You can see the the leds. None of the numbers return anything useful.
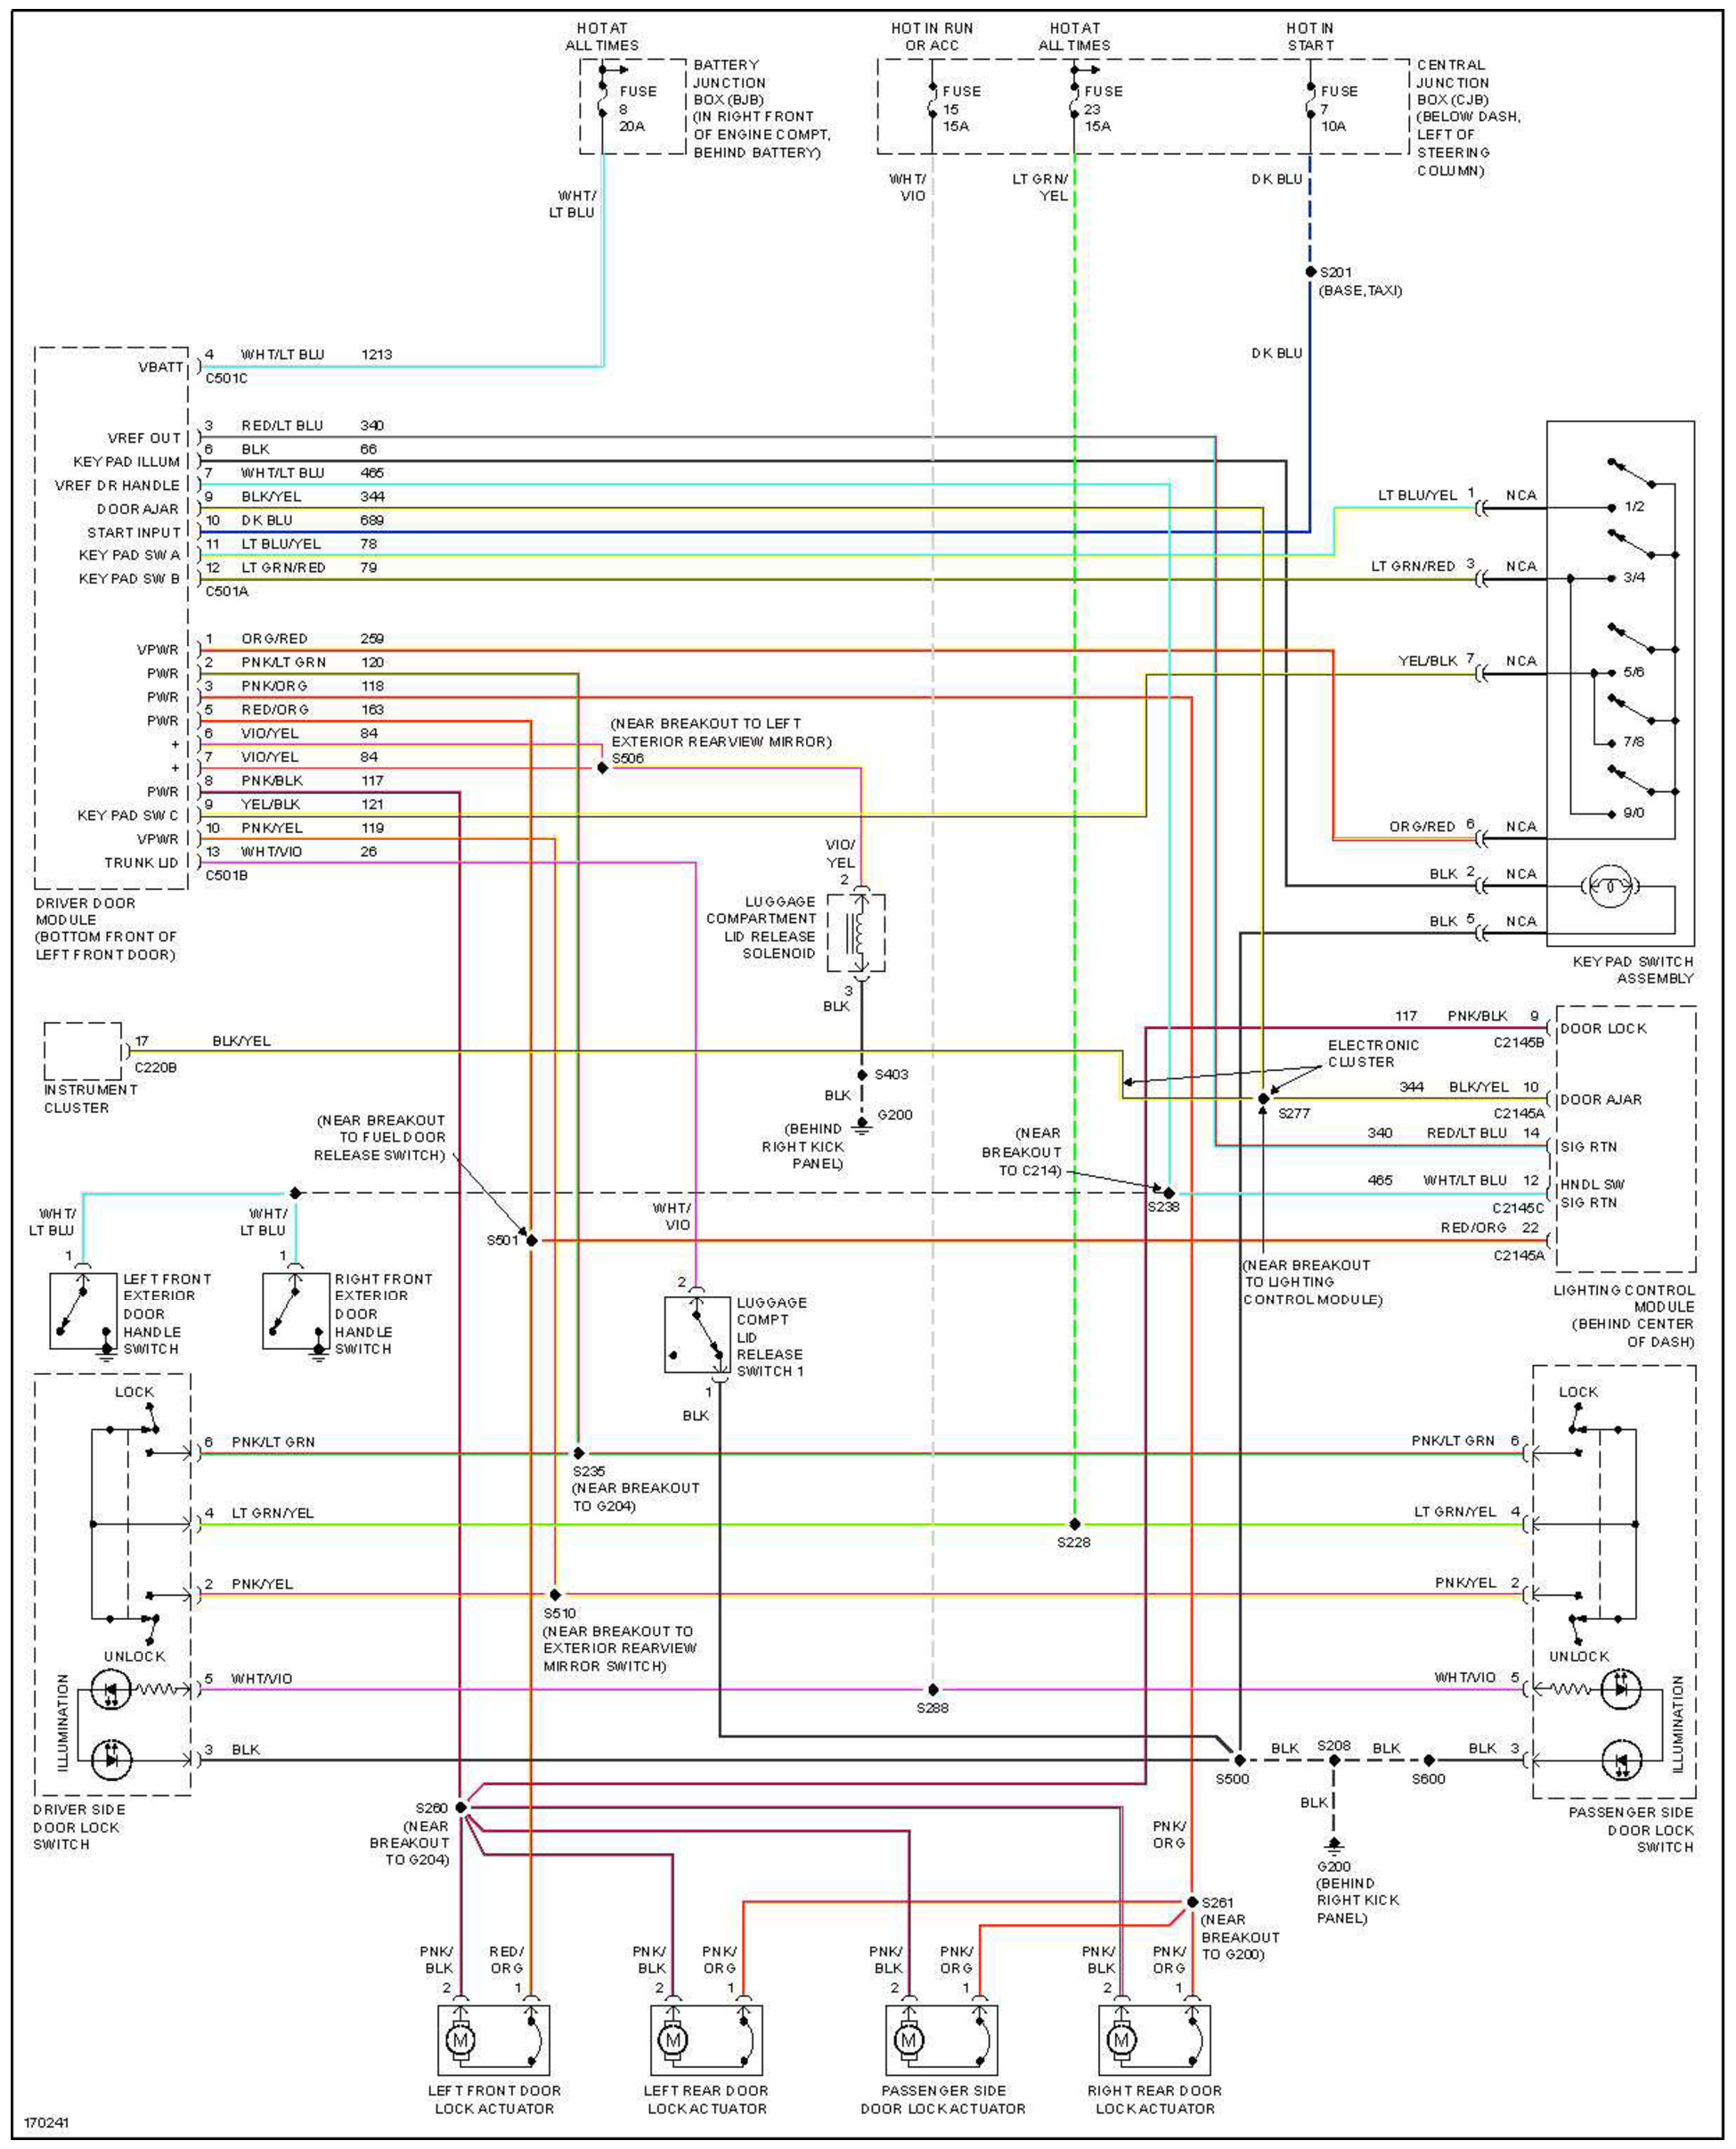
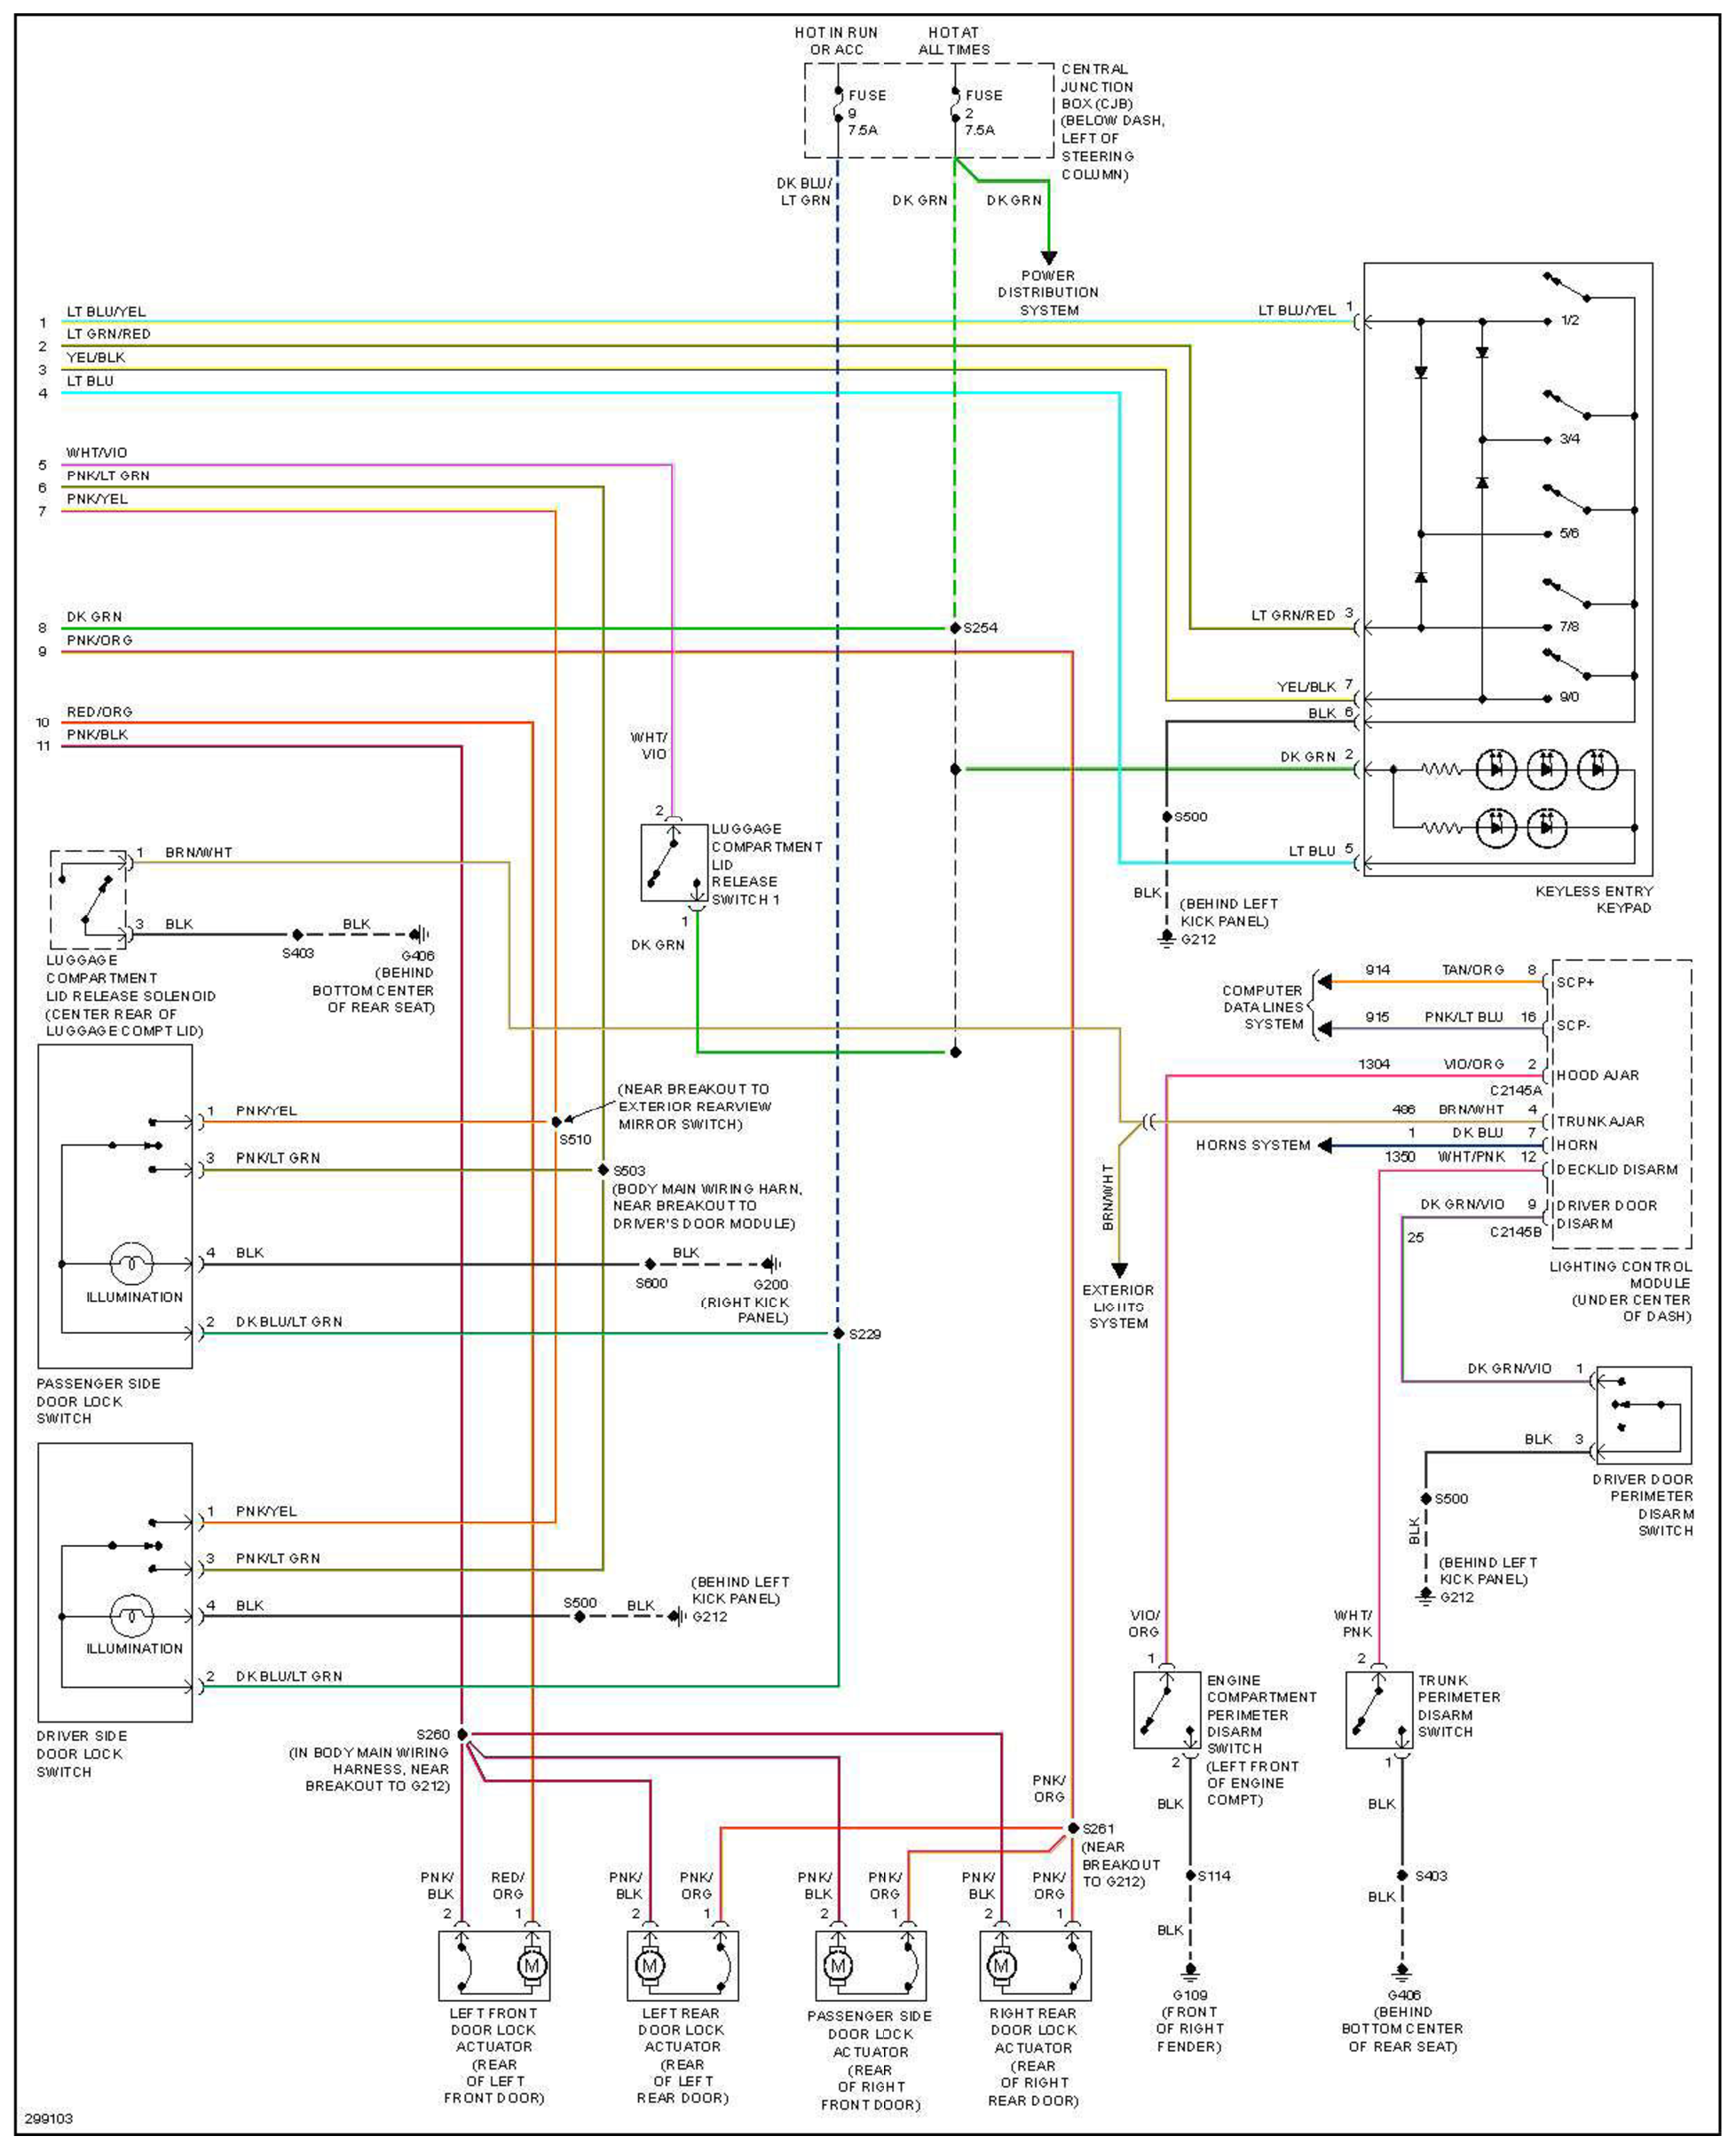
The Schematics:

Marauder:
2009 ford crown victoria lx
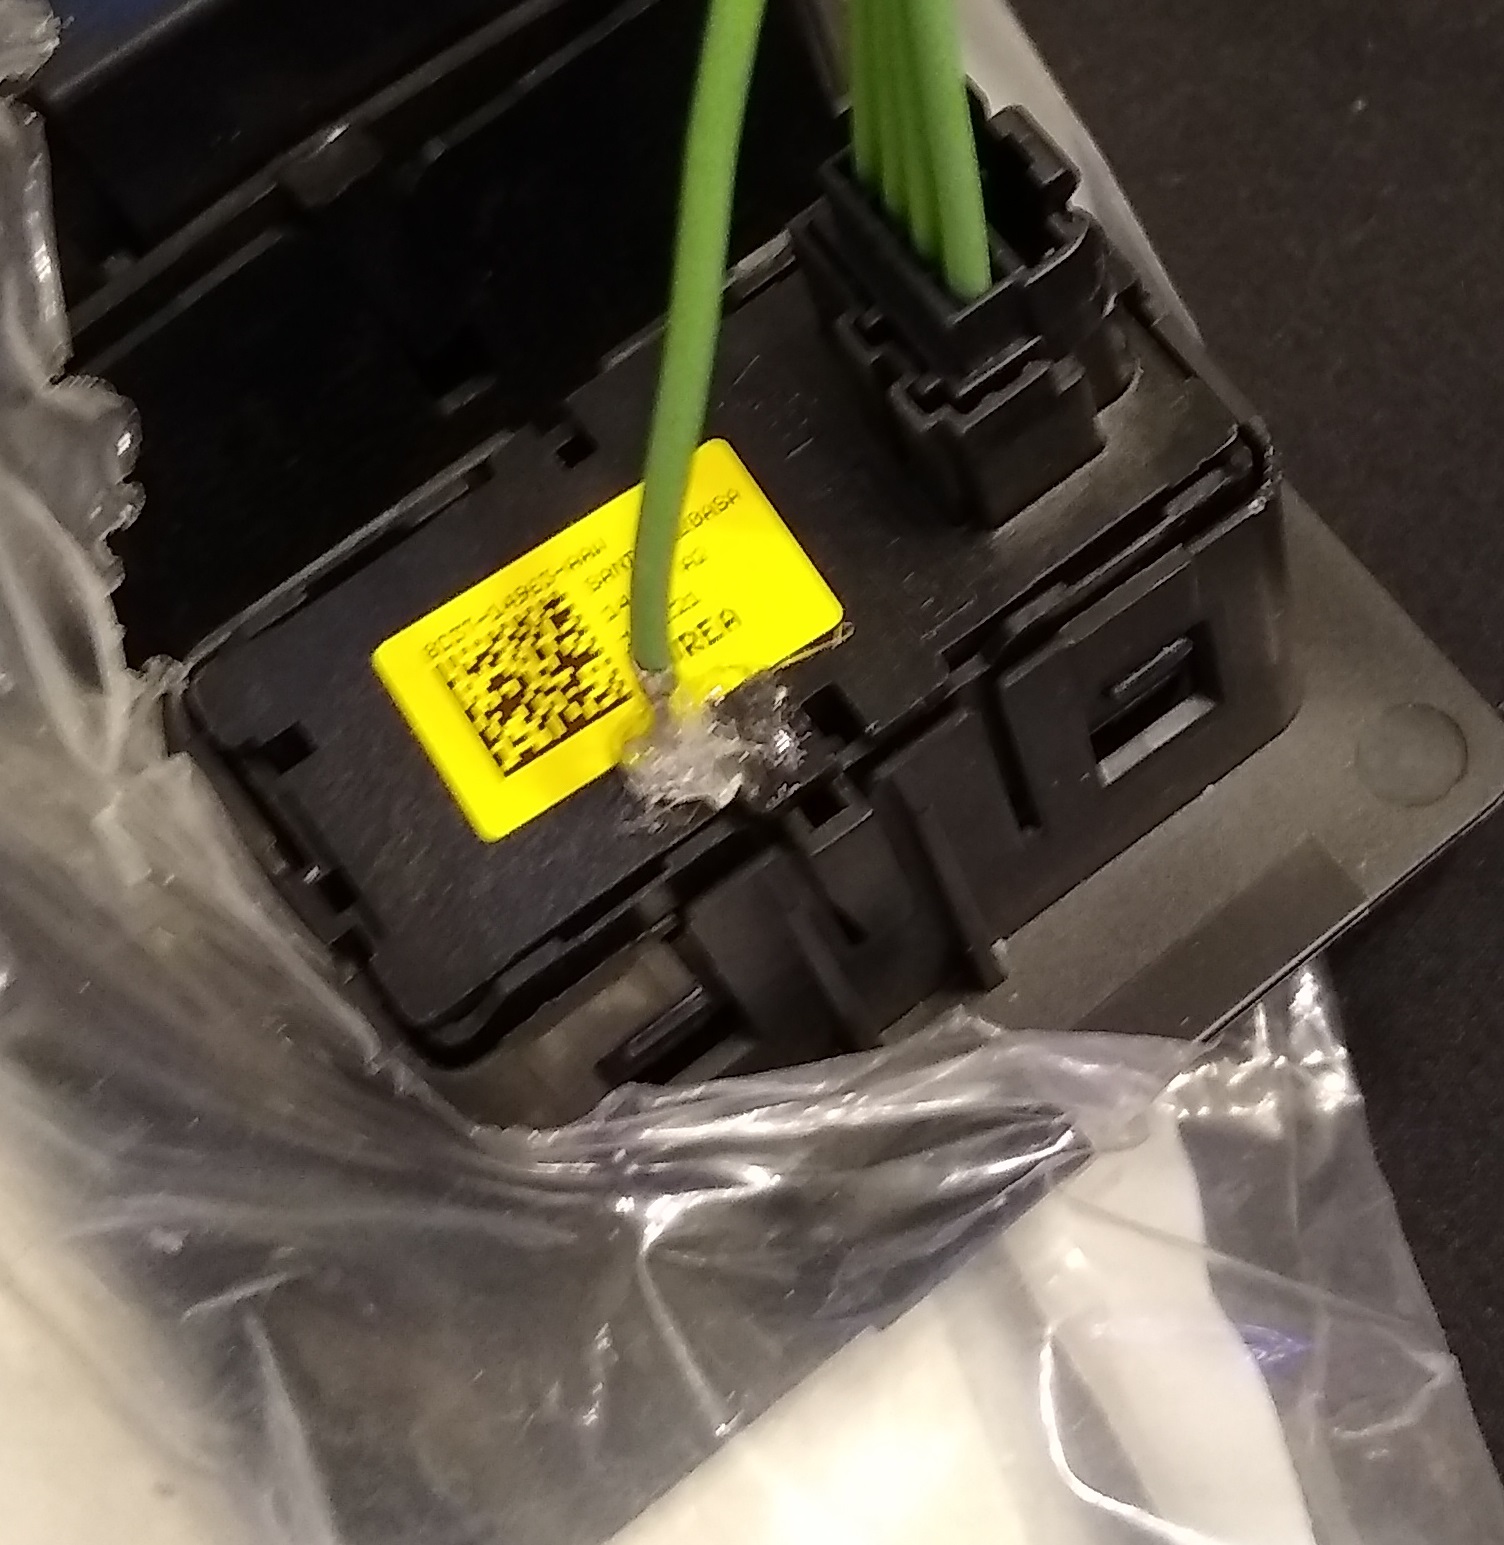
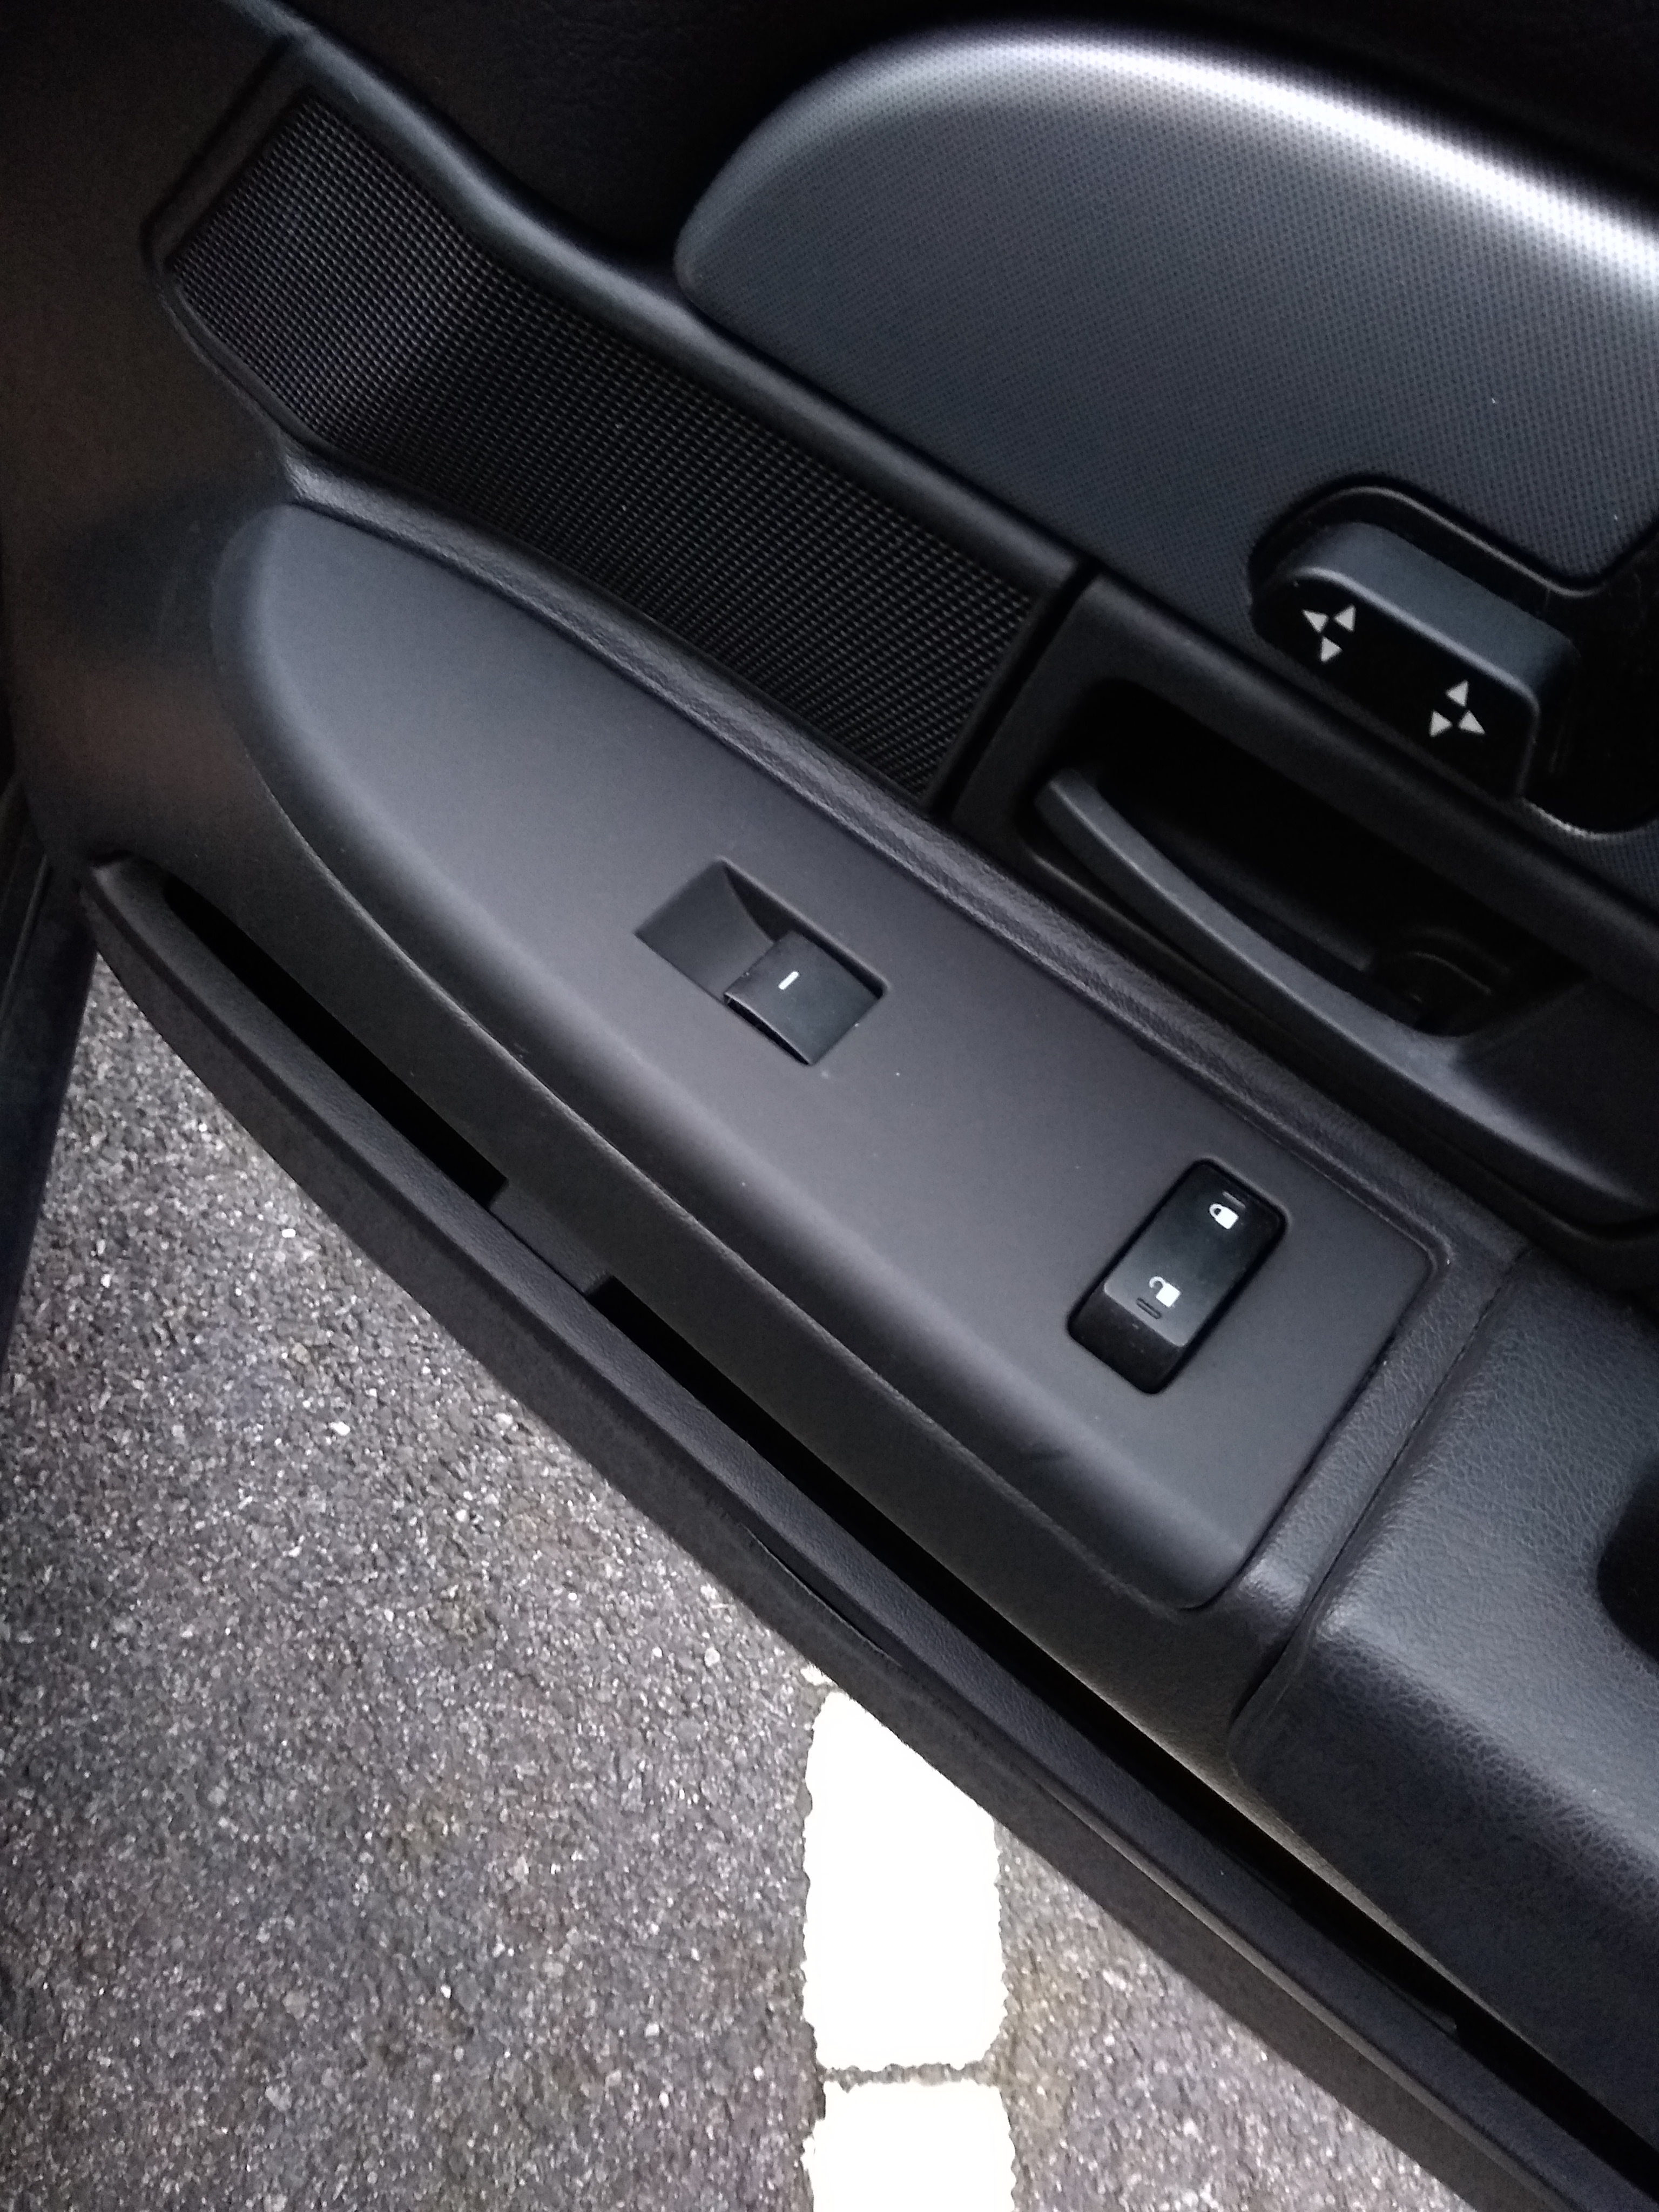
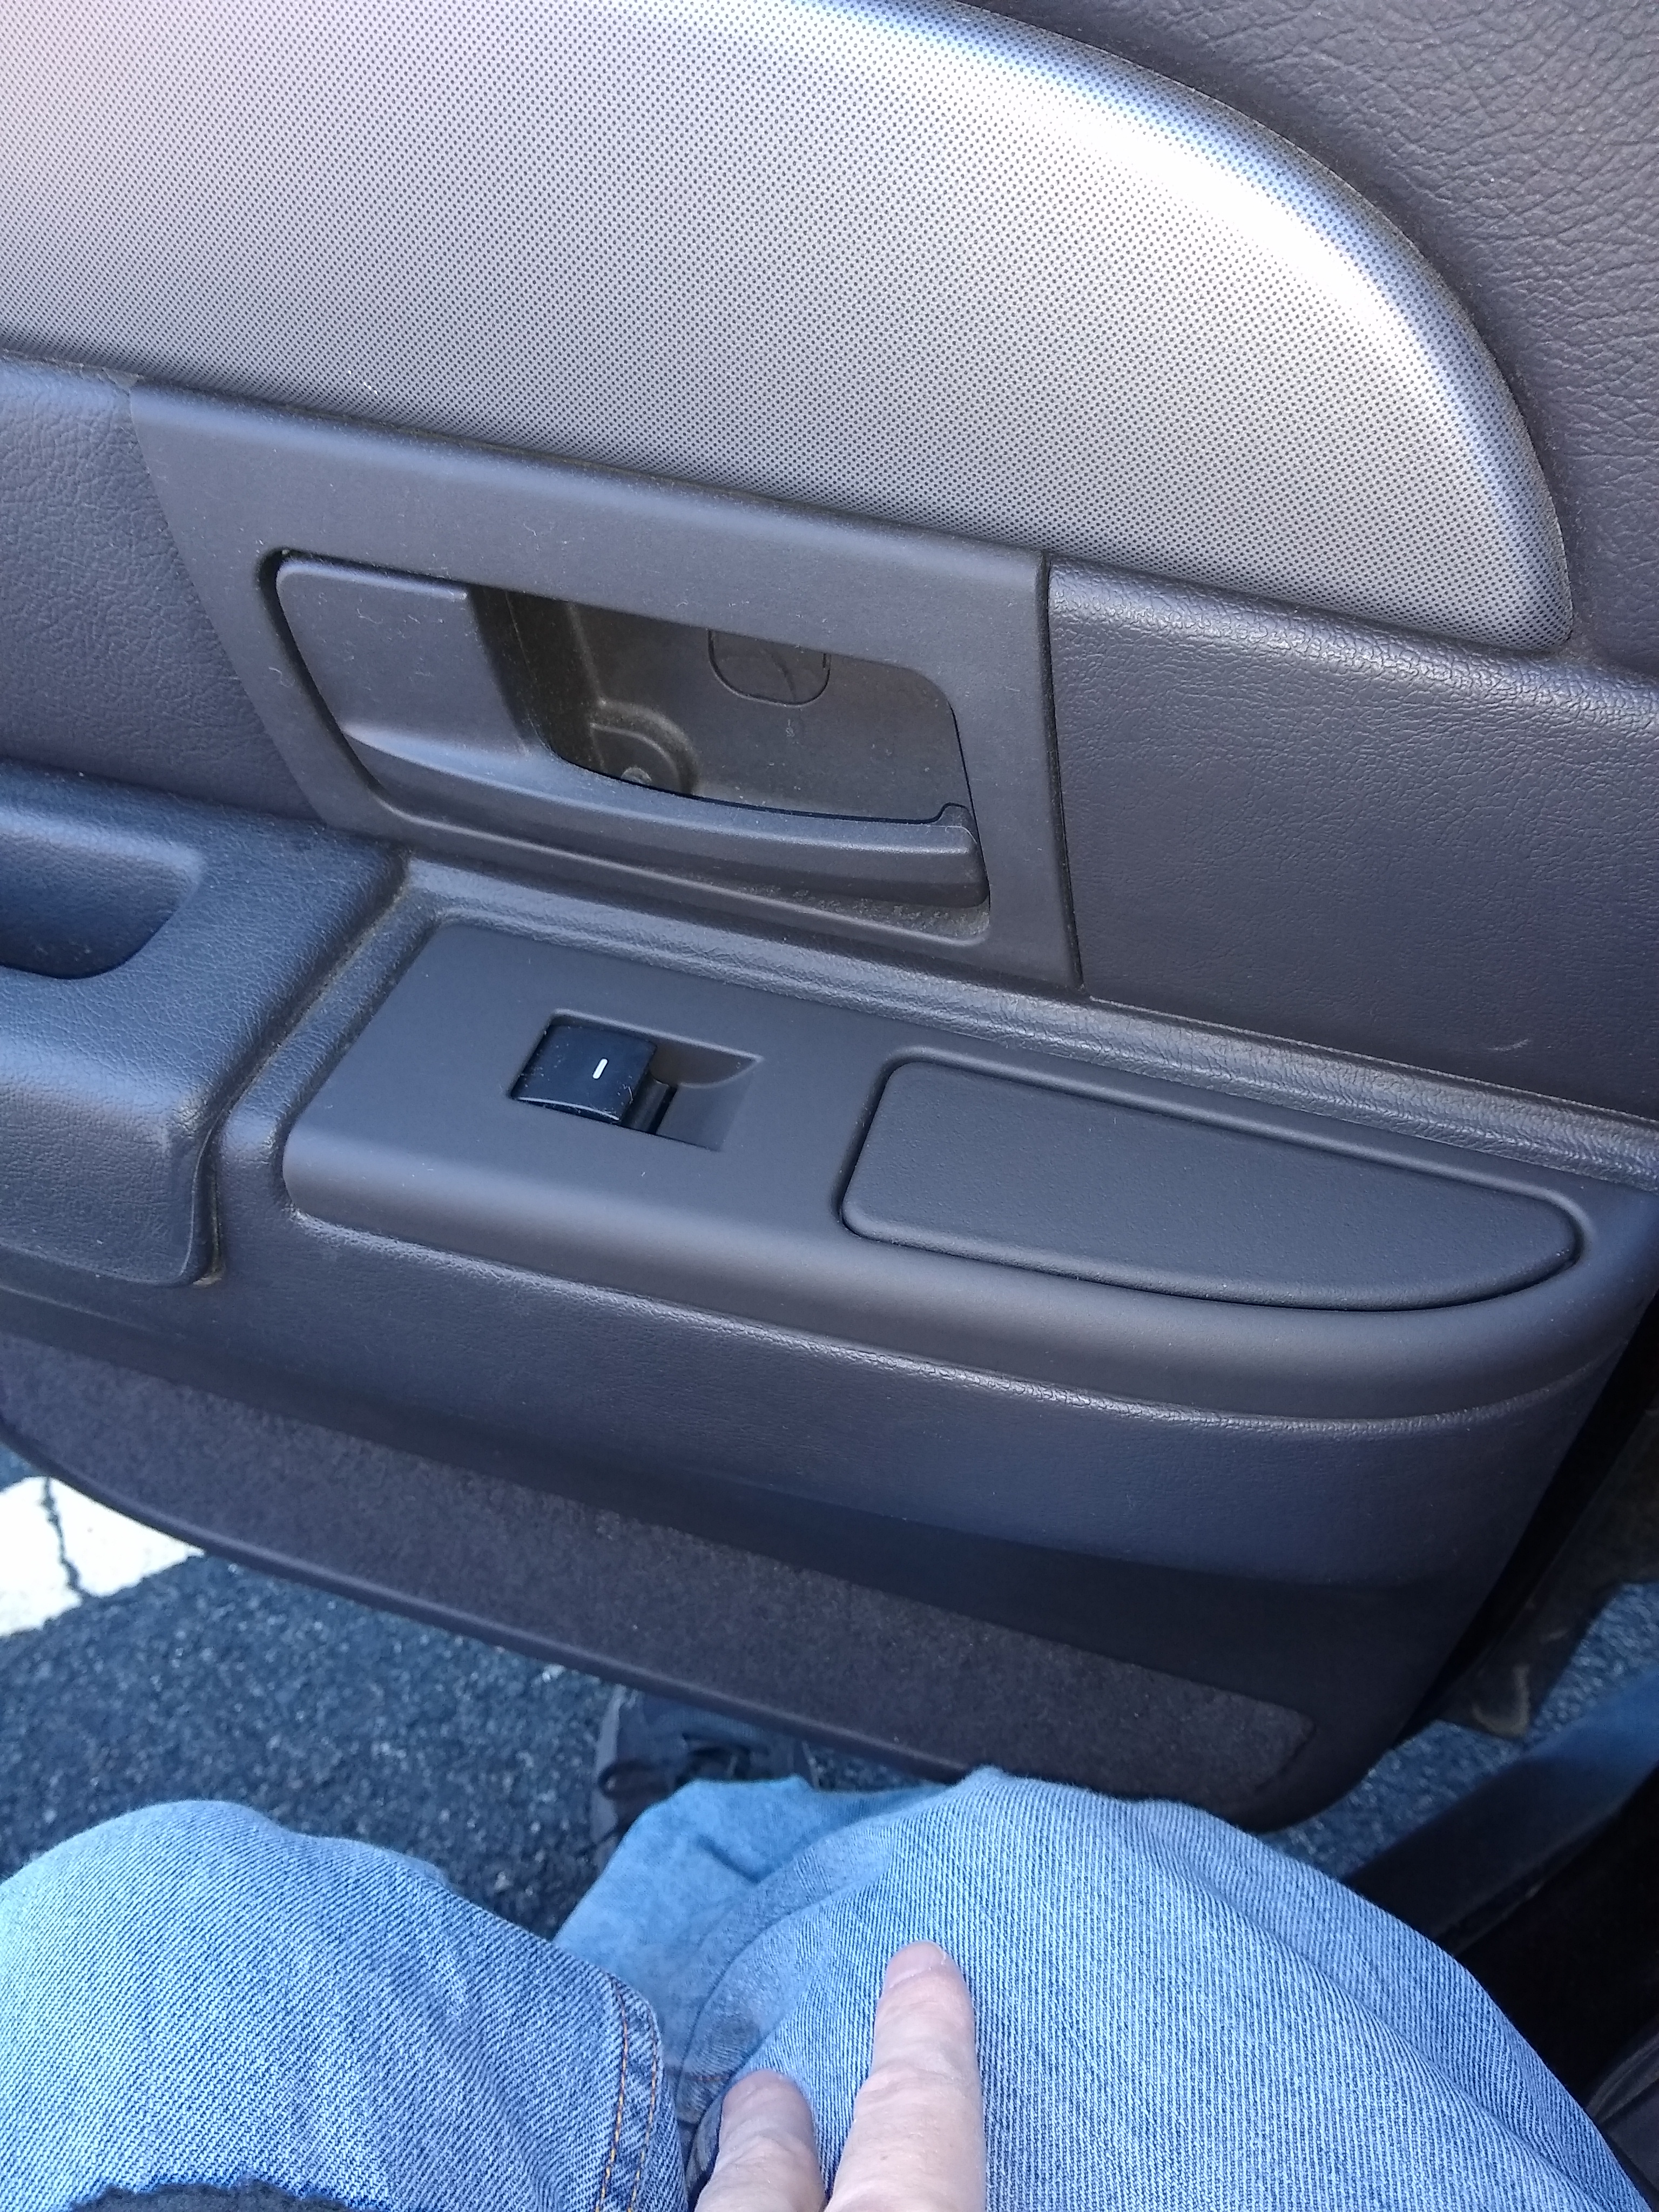
Final product:
Be sure to take your time and dress the wires in the door panels now that there is so many more.
--- Visits: